

When it comes to customer service and our customers needing to get in touch with a support service for the product or service they’ve purchased, email is still a pretty popular option! Yes, we’ve seen a big move to other channels such as live chat and even options like Apple Business Chat, but email is still a heavily used choice!
So, we still need to be able to efficiently have support agents or workers in customer service departments pick up requests sent to teams via email! In this post, I’ll show you how we can implement email routing to agents in Omnichannel for Dynamics 365 Customer Service to support this conversation channel in Microsoft’s digital contact centre! 📧
Configuring a shared mailbox for email
So first, let’s take the basic scenario where customers are going to send their enquiries into a single shared mailbox and we’ll handle things from there. First we need a way of getting those requests into Dynamics 365. Let’s look at doing that first.
Creating a queue for incoming email in Dynamics
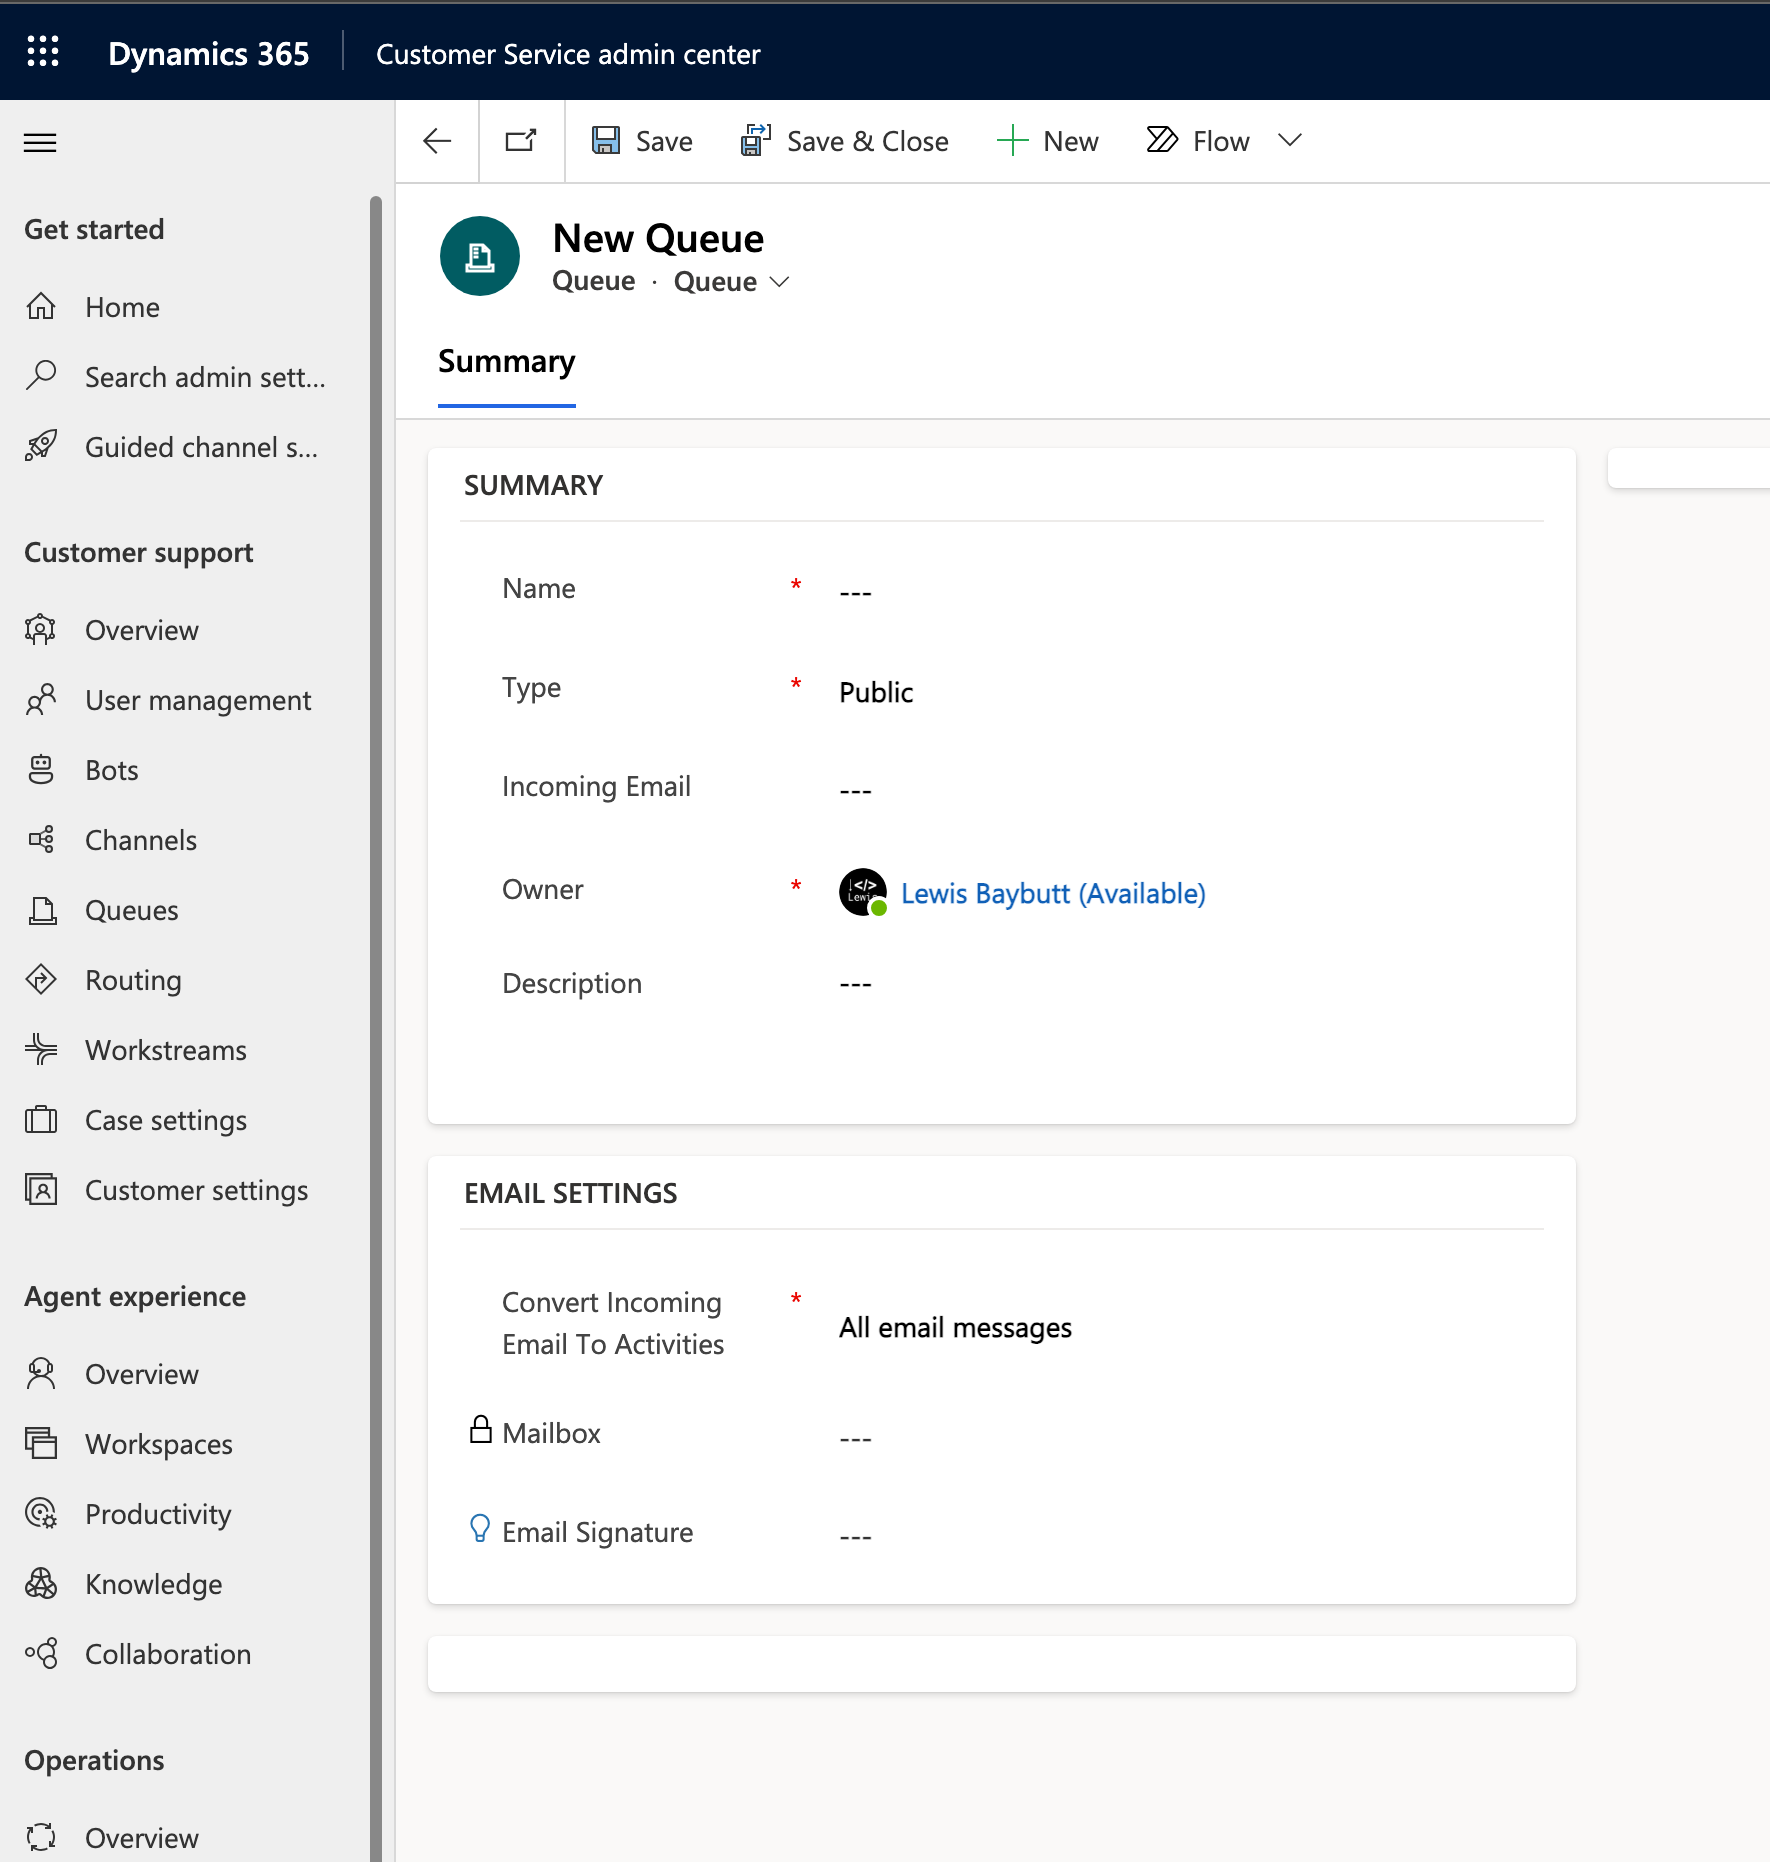
First, to be able to receive emails into Dynamics we have to create a queue for this which these emails will land in as queue items. When we create this queue with an incoming email address, we’ll be able to then approve the mailbox in the email configuration area of Dynamics to make things work here!
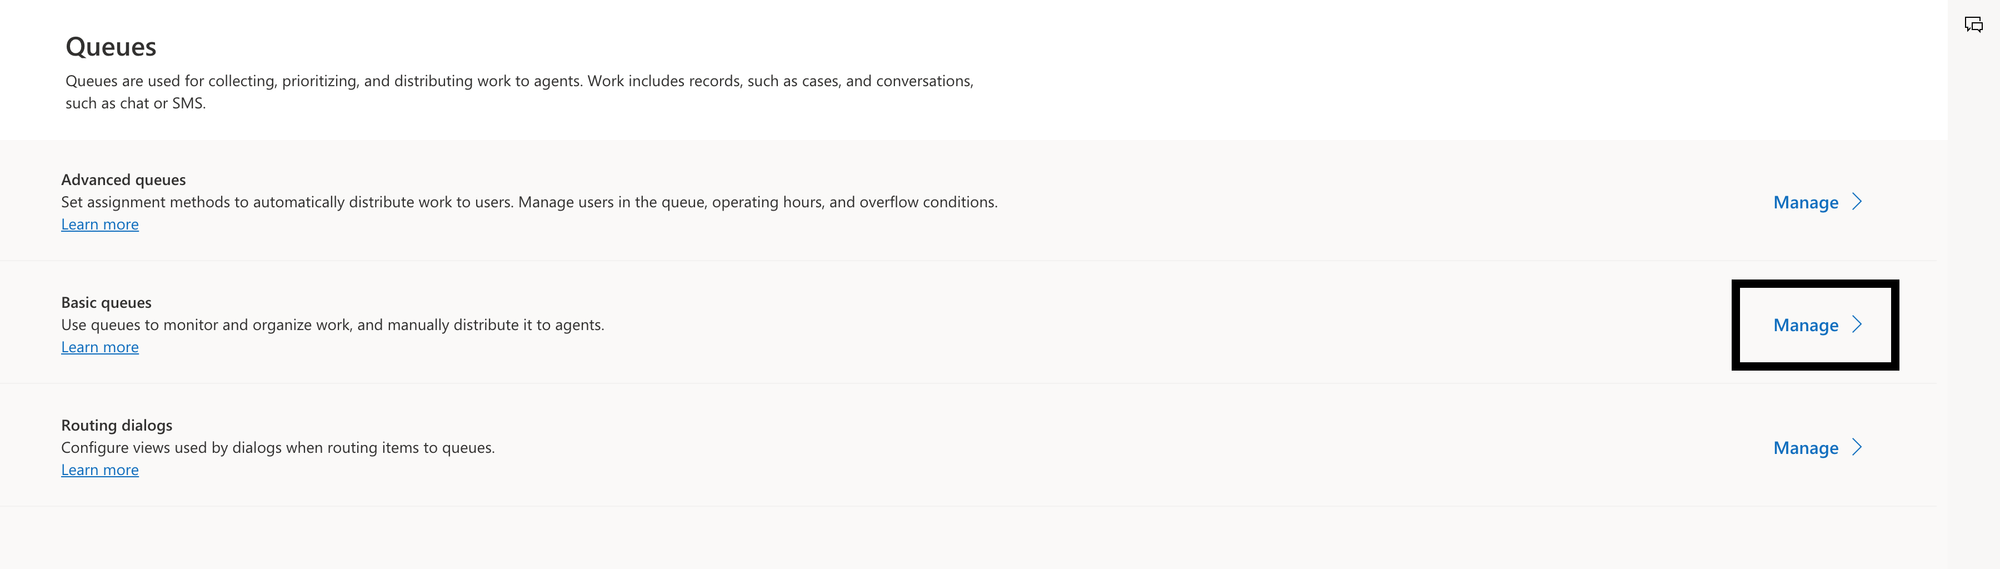
I’m going to head to the Customer Service admin centre and then select queues in the navigation. From there I’ll manage basic queues to create a new one.
Now I’ll create a new queue and give it a relevant name. Then in the incoming email field, I’ll populate the email address of the shared mailbox in my tenant that I want to work with here.
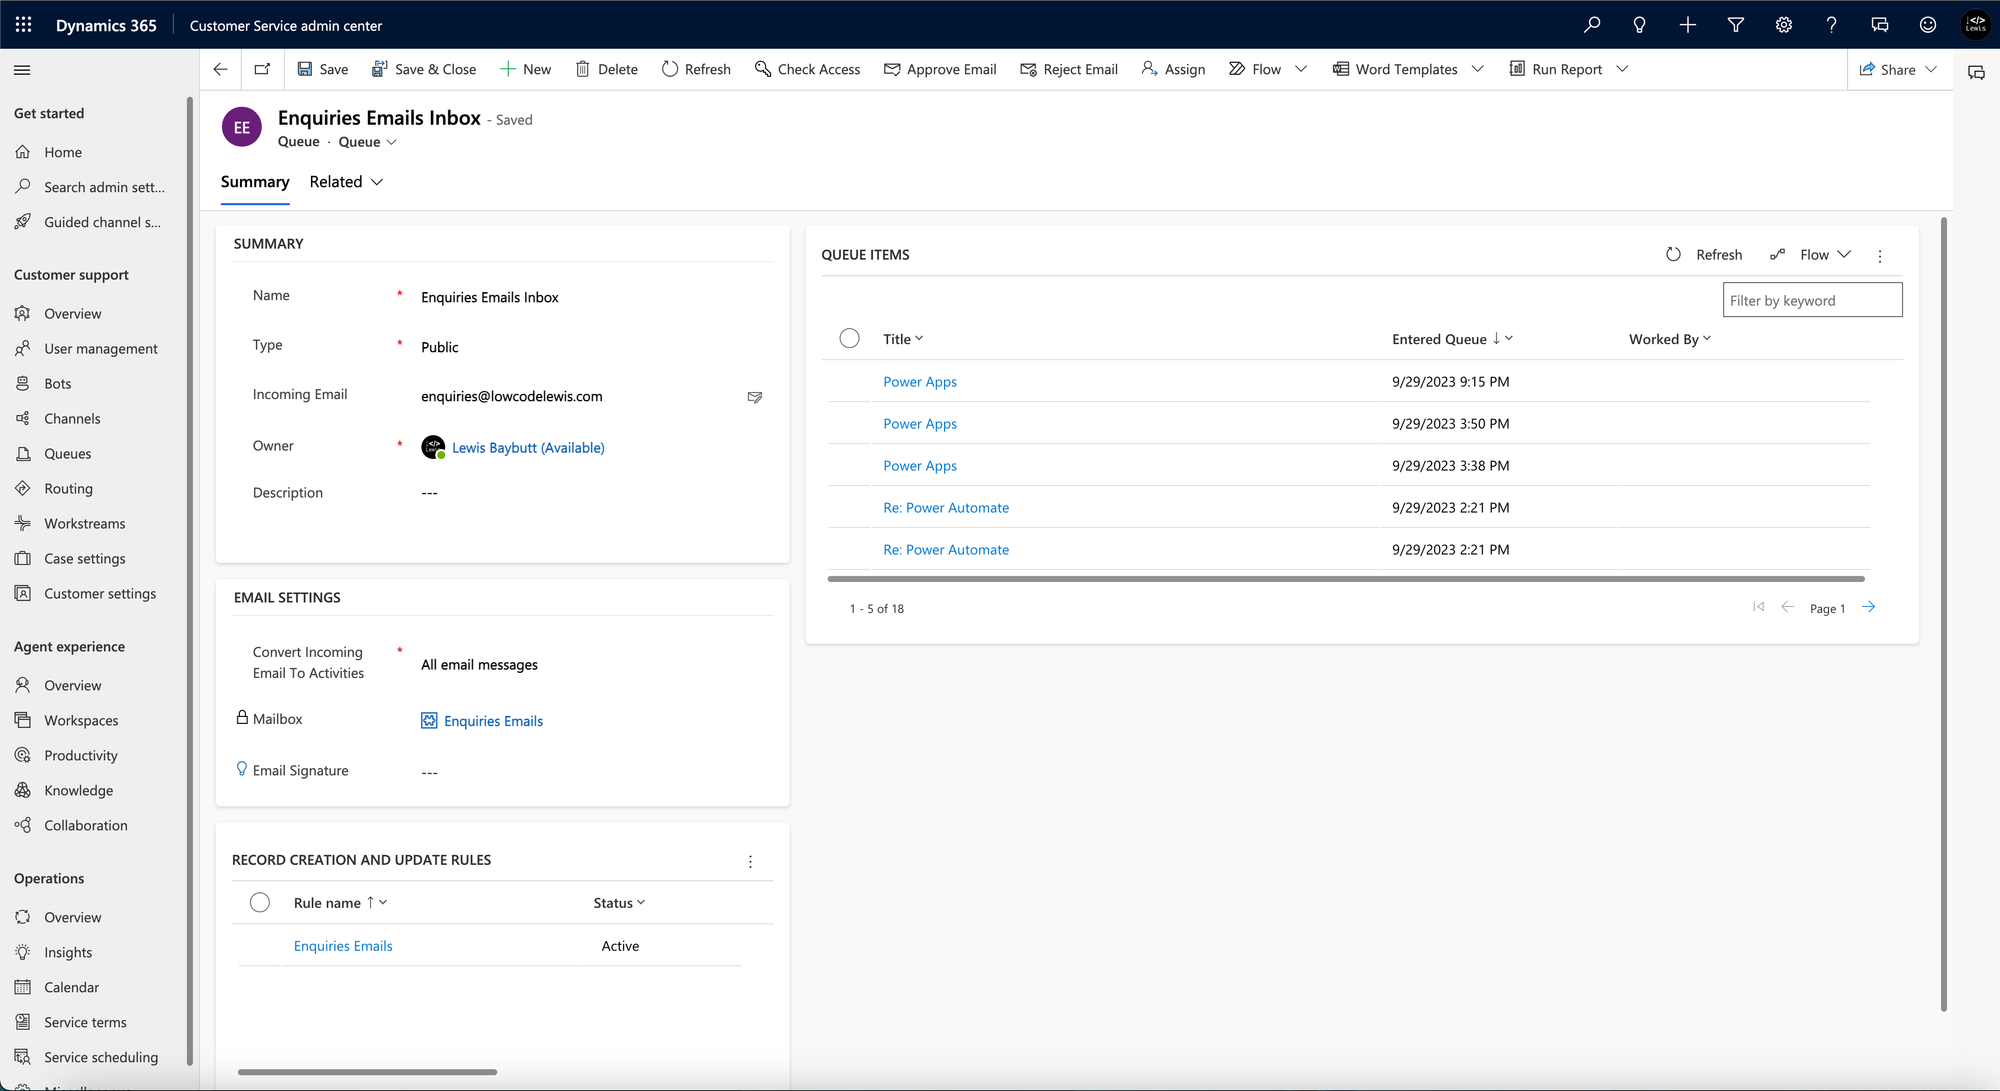
I’ve setup my enquiries shared mailbox. You can see I’ve been doing some testing here as I’ve got queue items populated, and I’ve also got some record creation and update rules in place which we’ll take a look at in a moment.
Approve the mailbox in Dynamics 365
Now to allow Dynamics 365 to receive data from the mailbox and synchronise anything coming into the mailbox between itself and Dynamics we need to make a mailbox approval here.
Elevated permissions required
Note here, that an Exchange Administrator or Global Administrator role is required to approve the use of mailboxes in Dynamics 365.
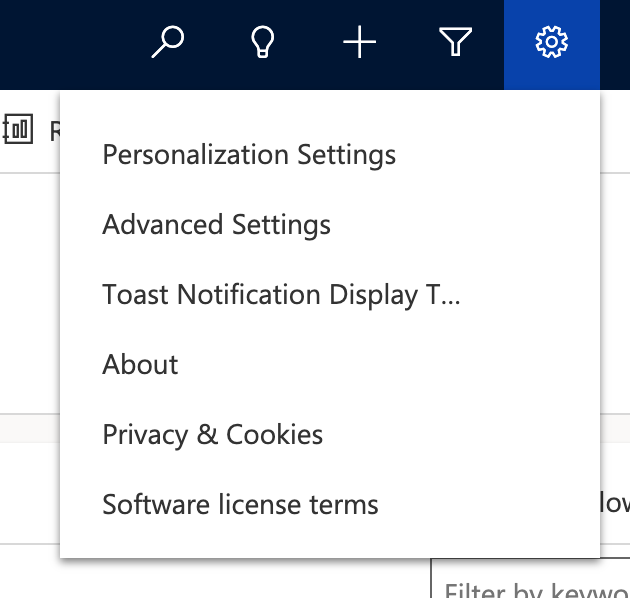
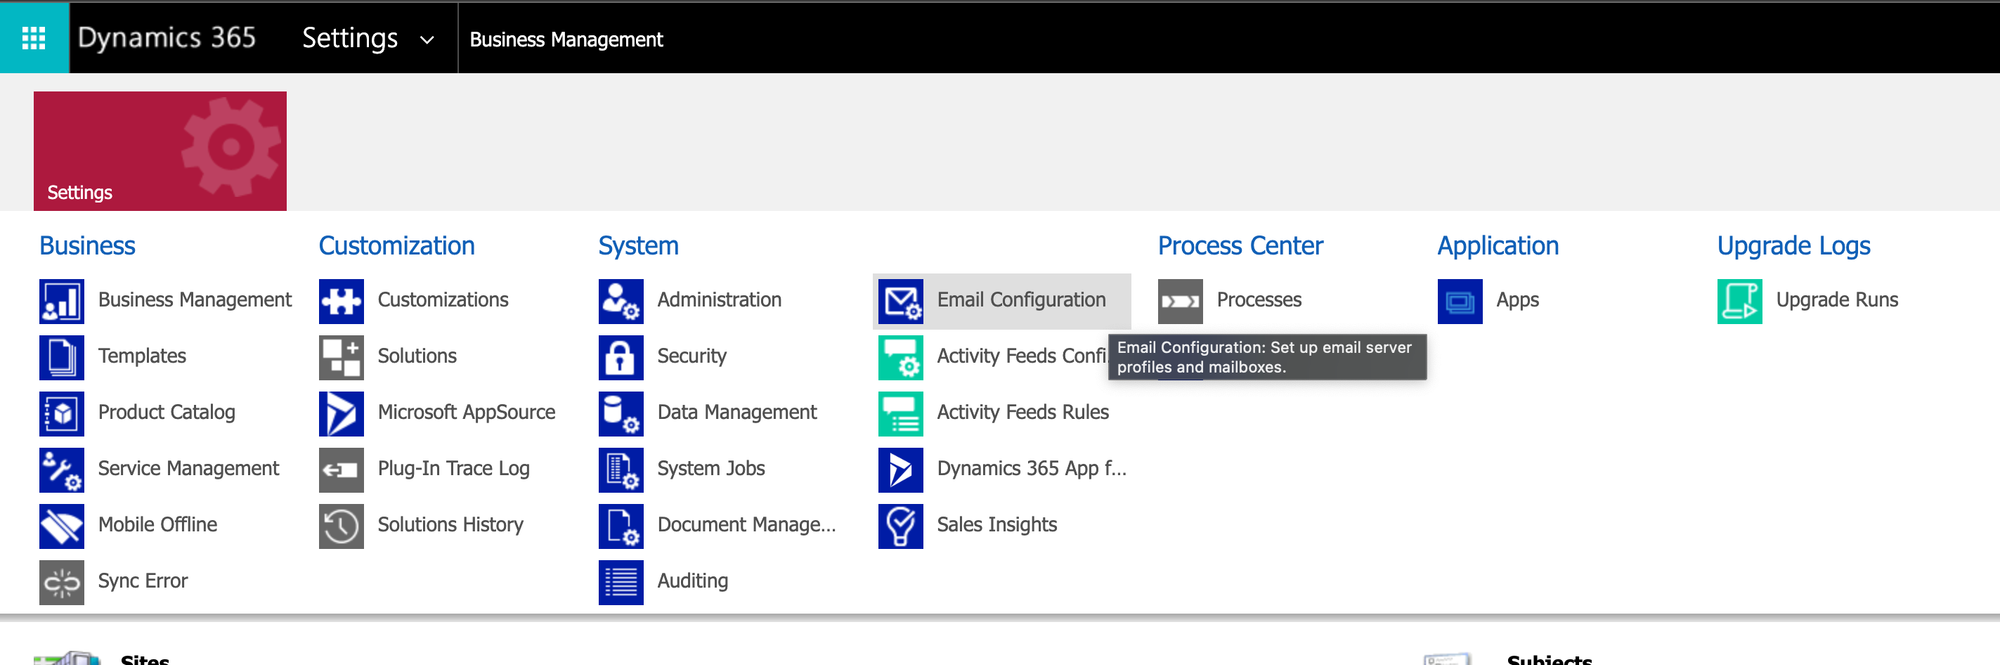
In Dynamics 365, head to Advanced Settings.
Now in advanced settings, head to email configuration, which is where we’ll be able to approve the mailbox just created as a queue.
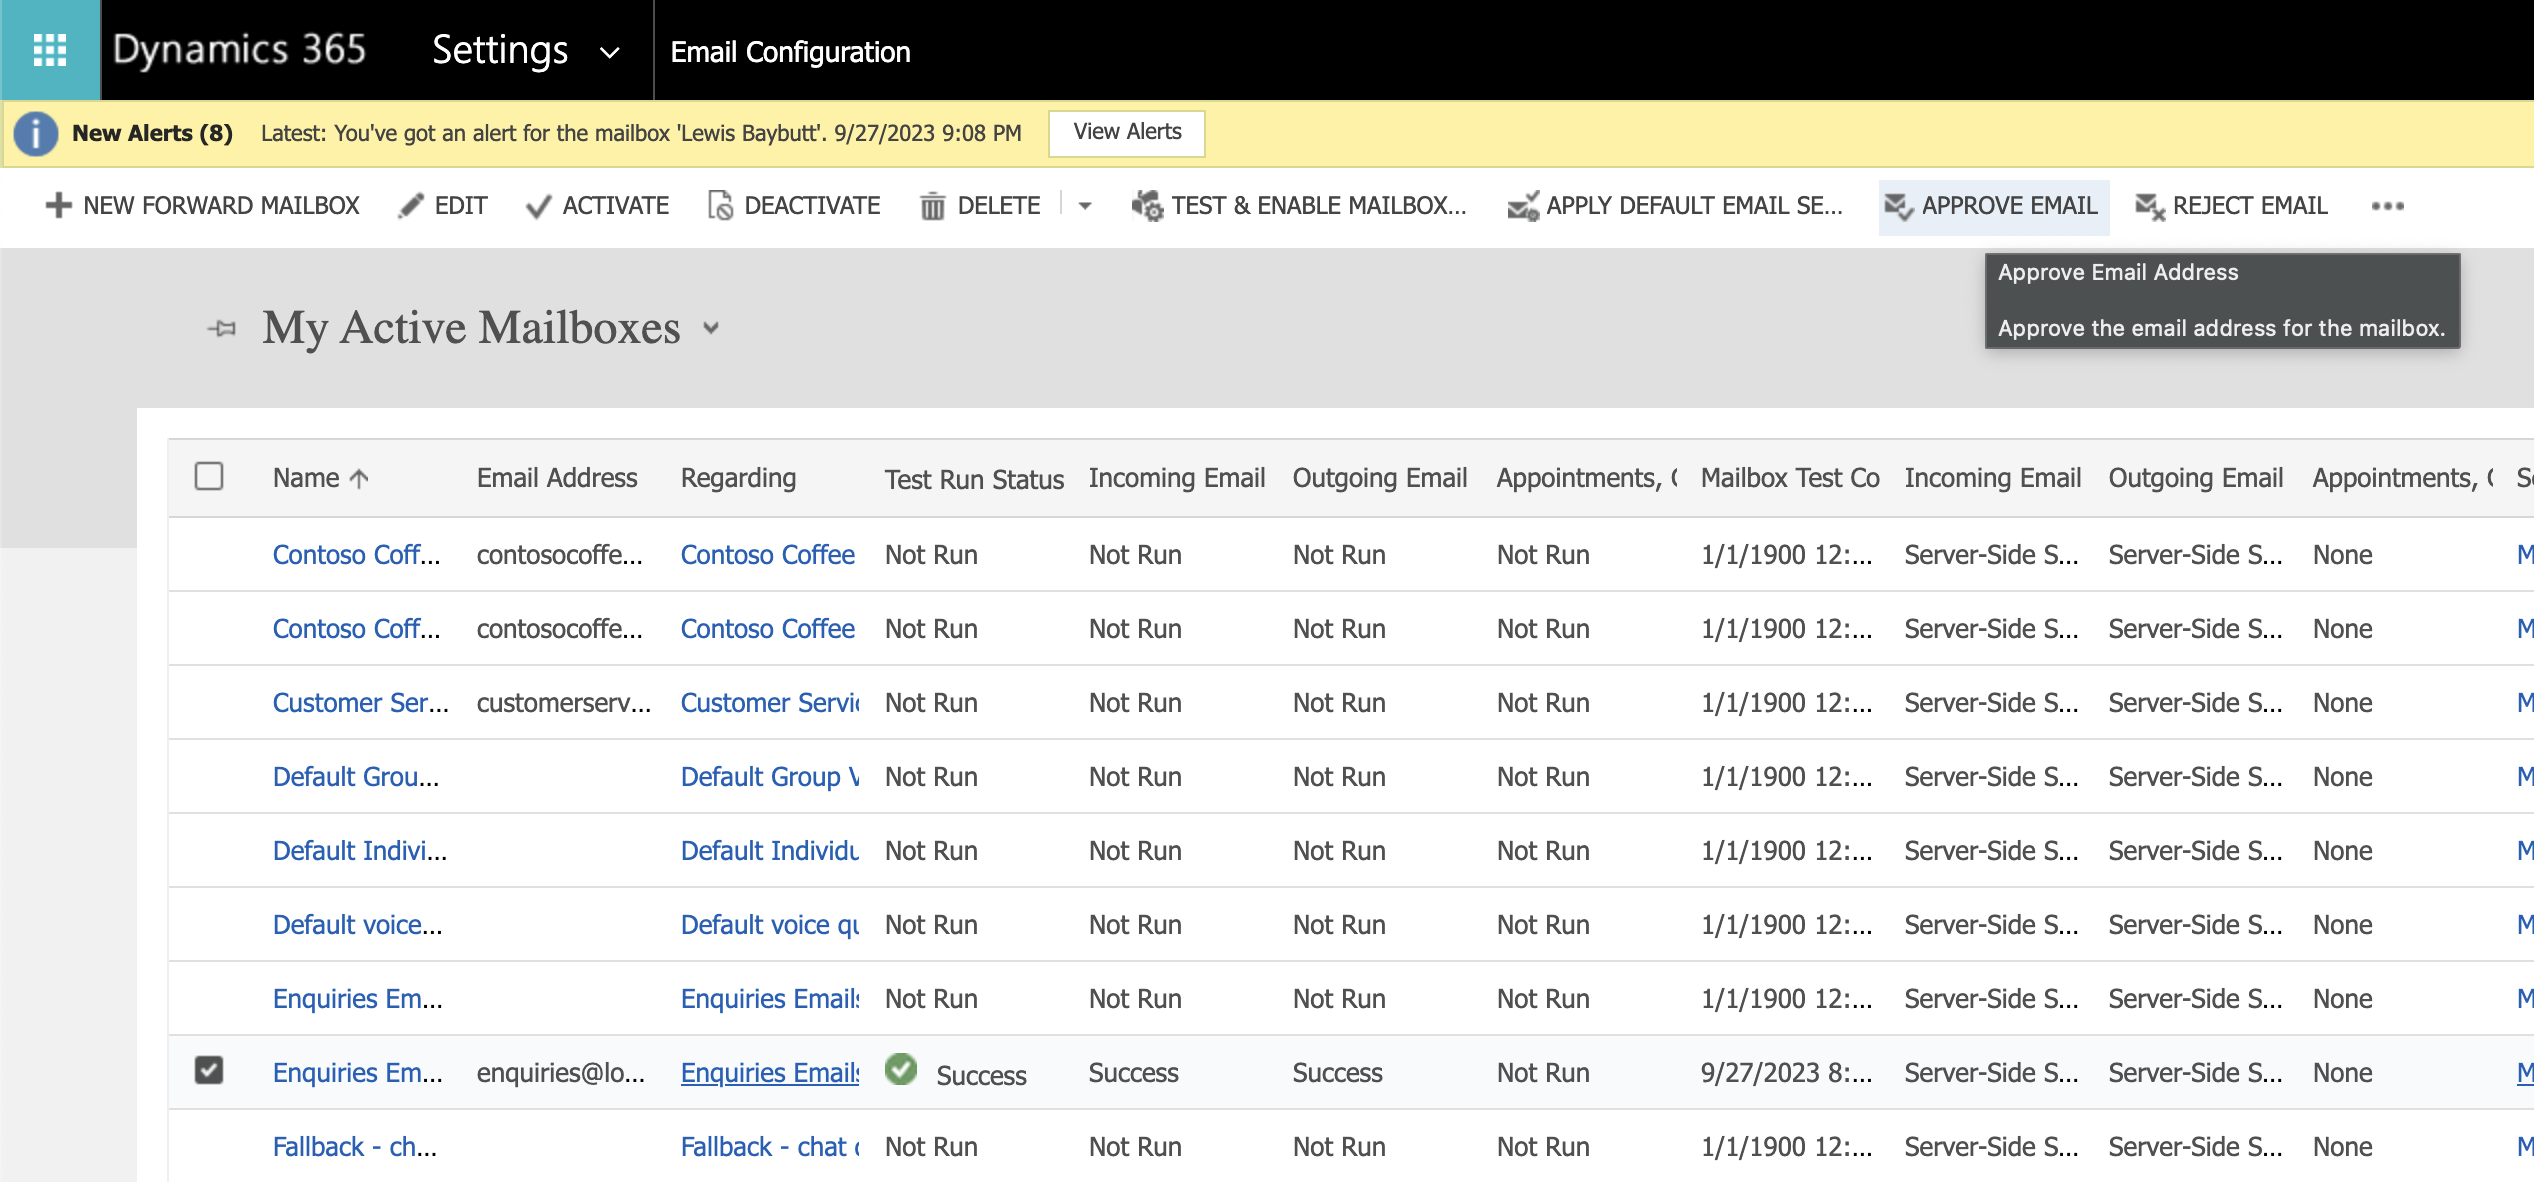
Select mailboxes.

Now for the mailbox you created as a queue, select it and then select approve email. You may then want to test and enable the mailbox to ensure things are working.
Now send an email to the shared mailbox you created in Dynamics 365 and you’ll notice in the mailbox the email item gets categorised ‘Tracked to Dynamics 365’ and you’ll see the email as a queue item in the queue. Select this and the email (activity) record will open.
Case creation and update rules for incoming email
Now that we’re able to receive emails into Dynamics we need a way of agents being able to pick up or have the work coming in pushed to them. In this post, I’m going to look at a push scenario. To make this work, we will use a record based workstream and the push functionality. We can use any type of record here but there’s a specific way in which I’m going to do this.
When routing email records directly to agents these can be a bit more tricky to work with, with being able to resolve the work items and have them closed off. So instead, we’re going to create or update cases for emails coming into Dynamics 365, and then we will route those cases as work items to agents to work on.
Configuring case creation and update rules
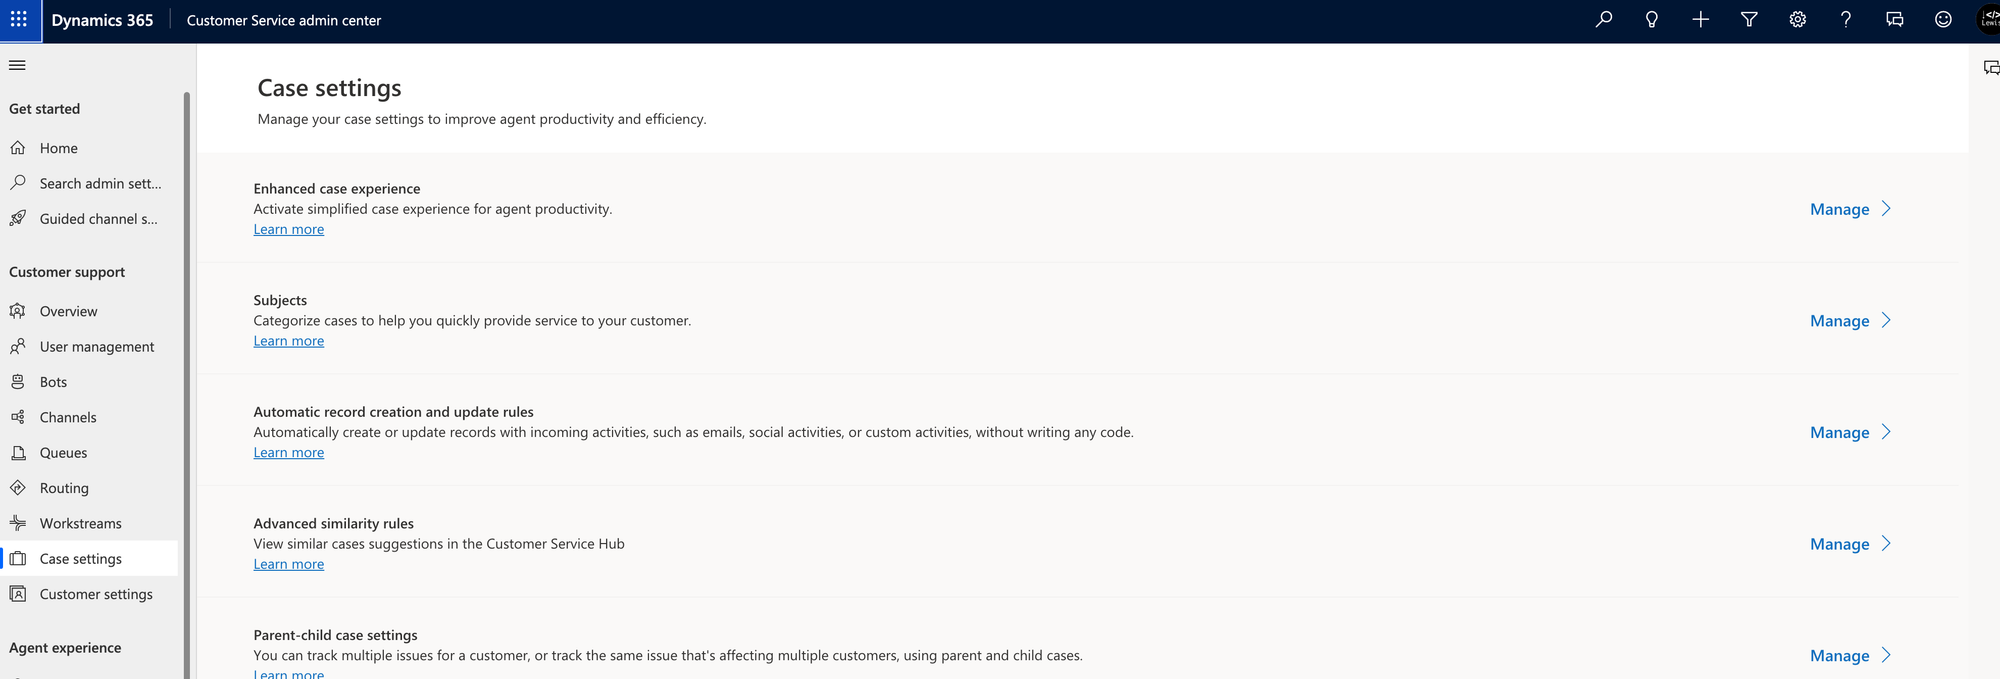
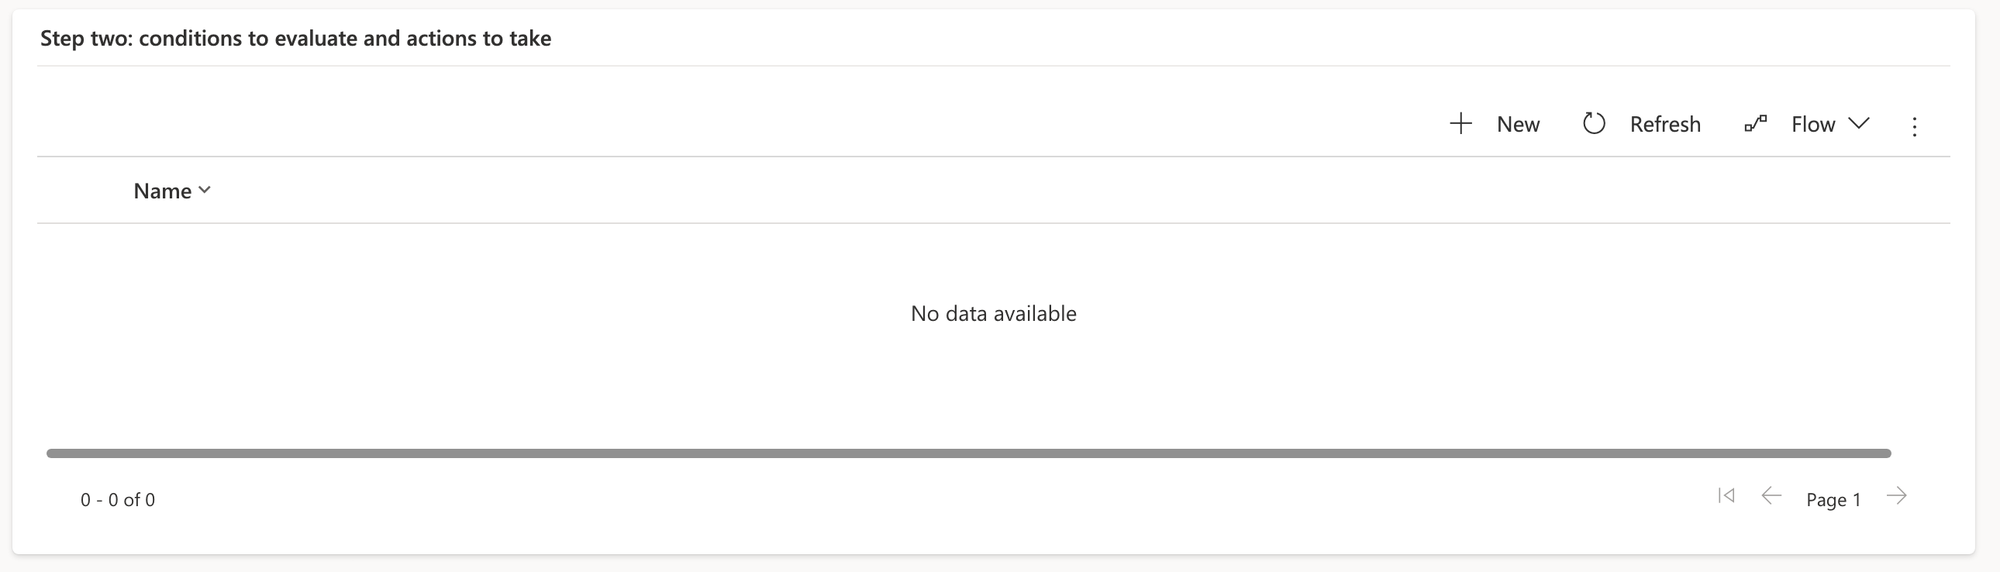
So, to make this work we need to configure something on the queue we created. Within case settings in the Customer Service admin centre select to manage the automatic record creation and update rules.
Now create a new rule and we’ll populate a few things. Start by populating the rule name and then add the queue to monitor which we created earlier. Then save the record.
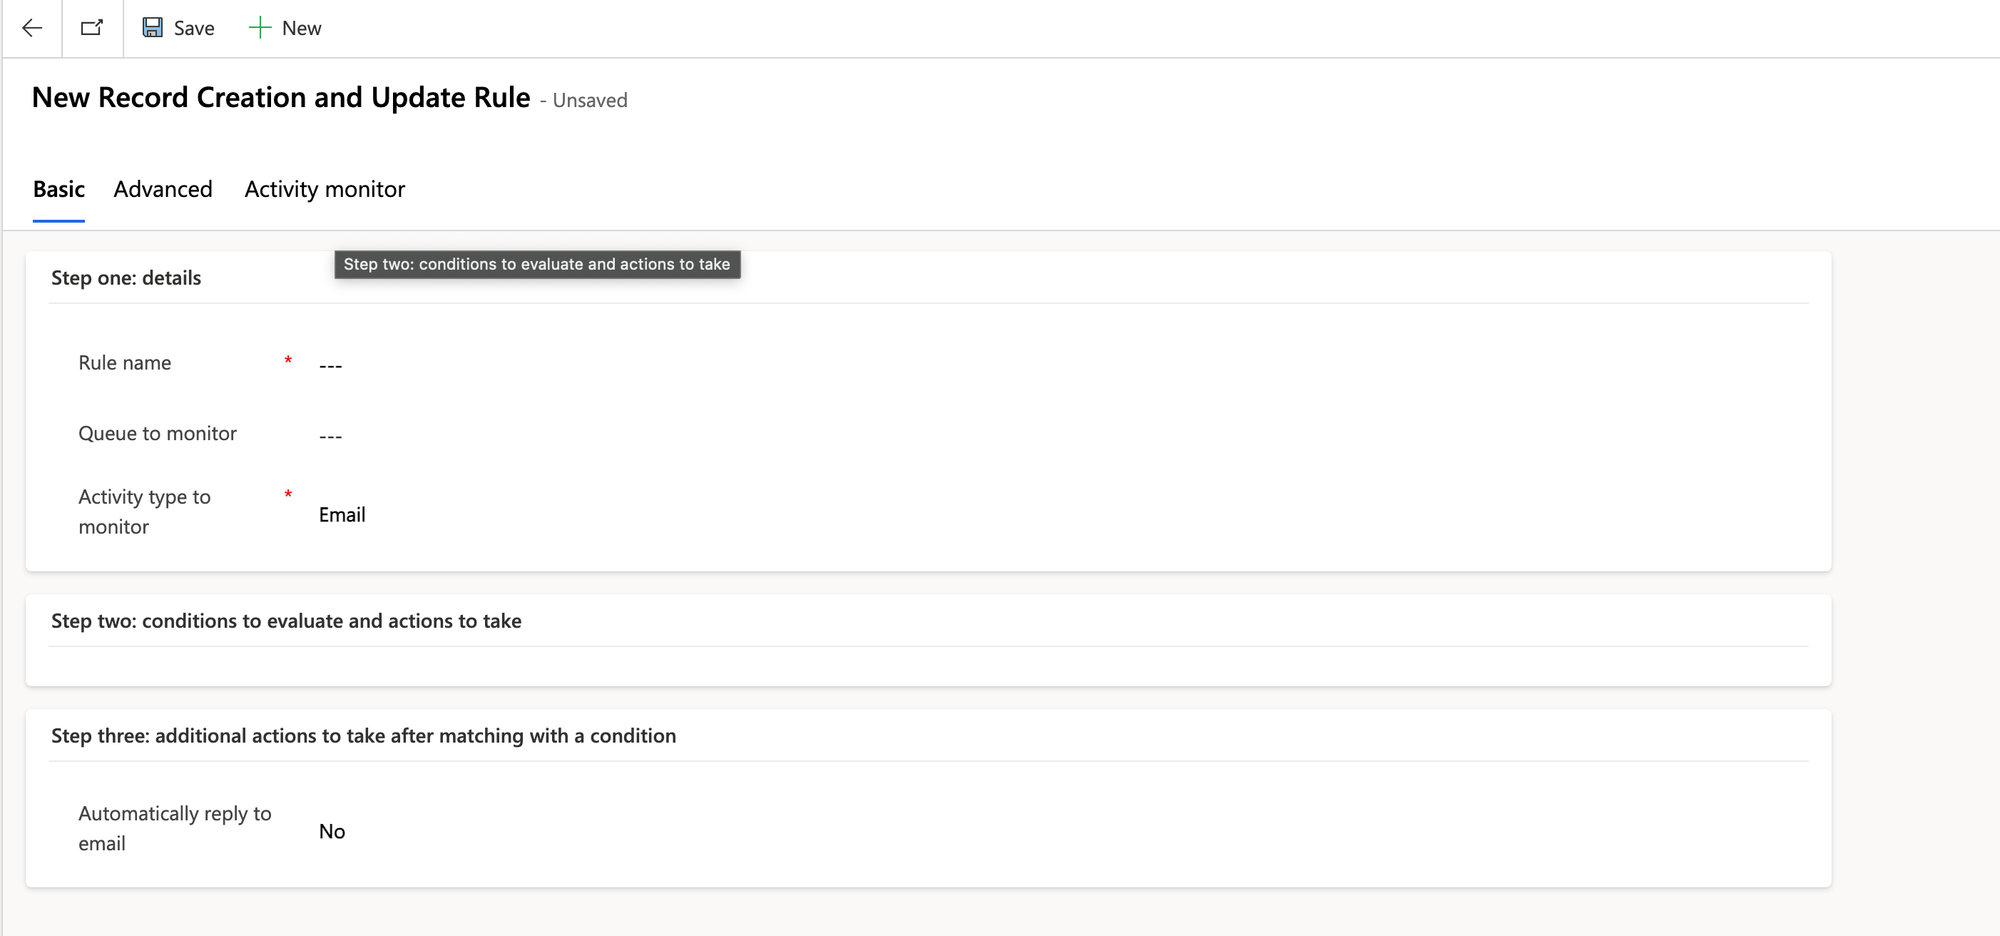
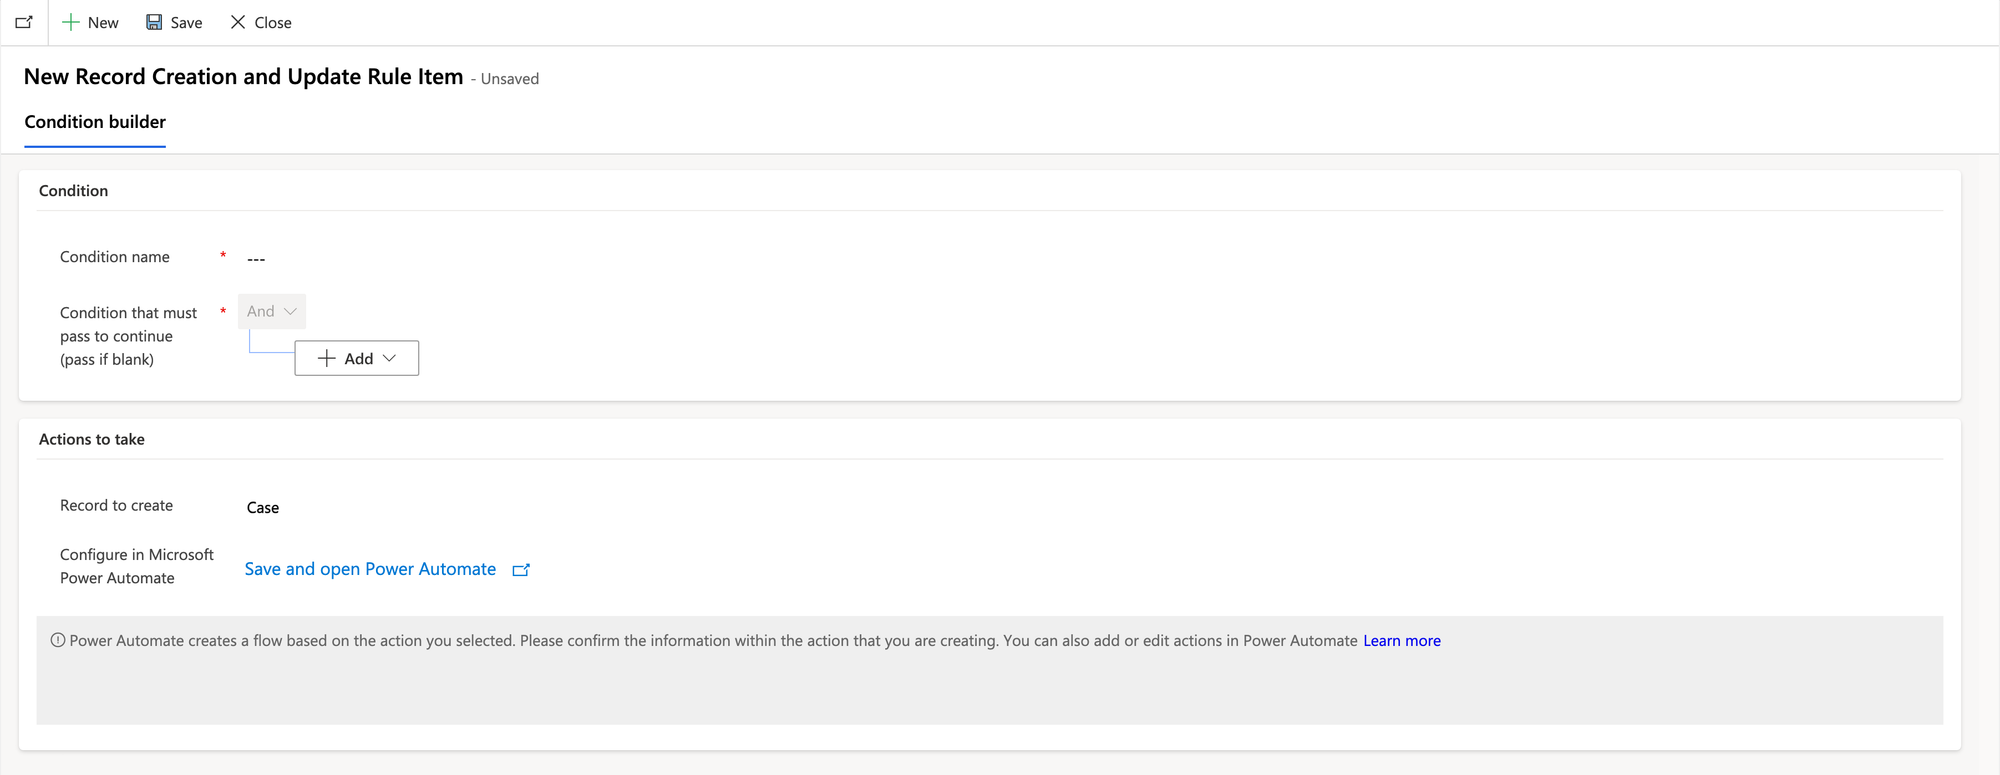
Now in the step two subgrid create a new actions record. This is where we’ll configure the part that creates cases for us.
Now give the condition a name, and add a condition if there should be one. If you want the rule to apply to all incoming emails leave this blank. Then select the ‘Save and open Power Automate’ link which will open a new flow in edit mode. Save the flow and return to Dynamics.
You should now have case record creation and update rules configured so whenever a new thread comes into Dynamics a case will be created for it, with any follow ups or same subject emails coming from the same sender making their way onto the same case.
Now we can start to configure a workstream to push these cases to agents when they get created for them to work on.
Configuring a workstream
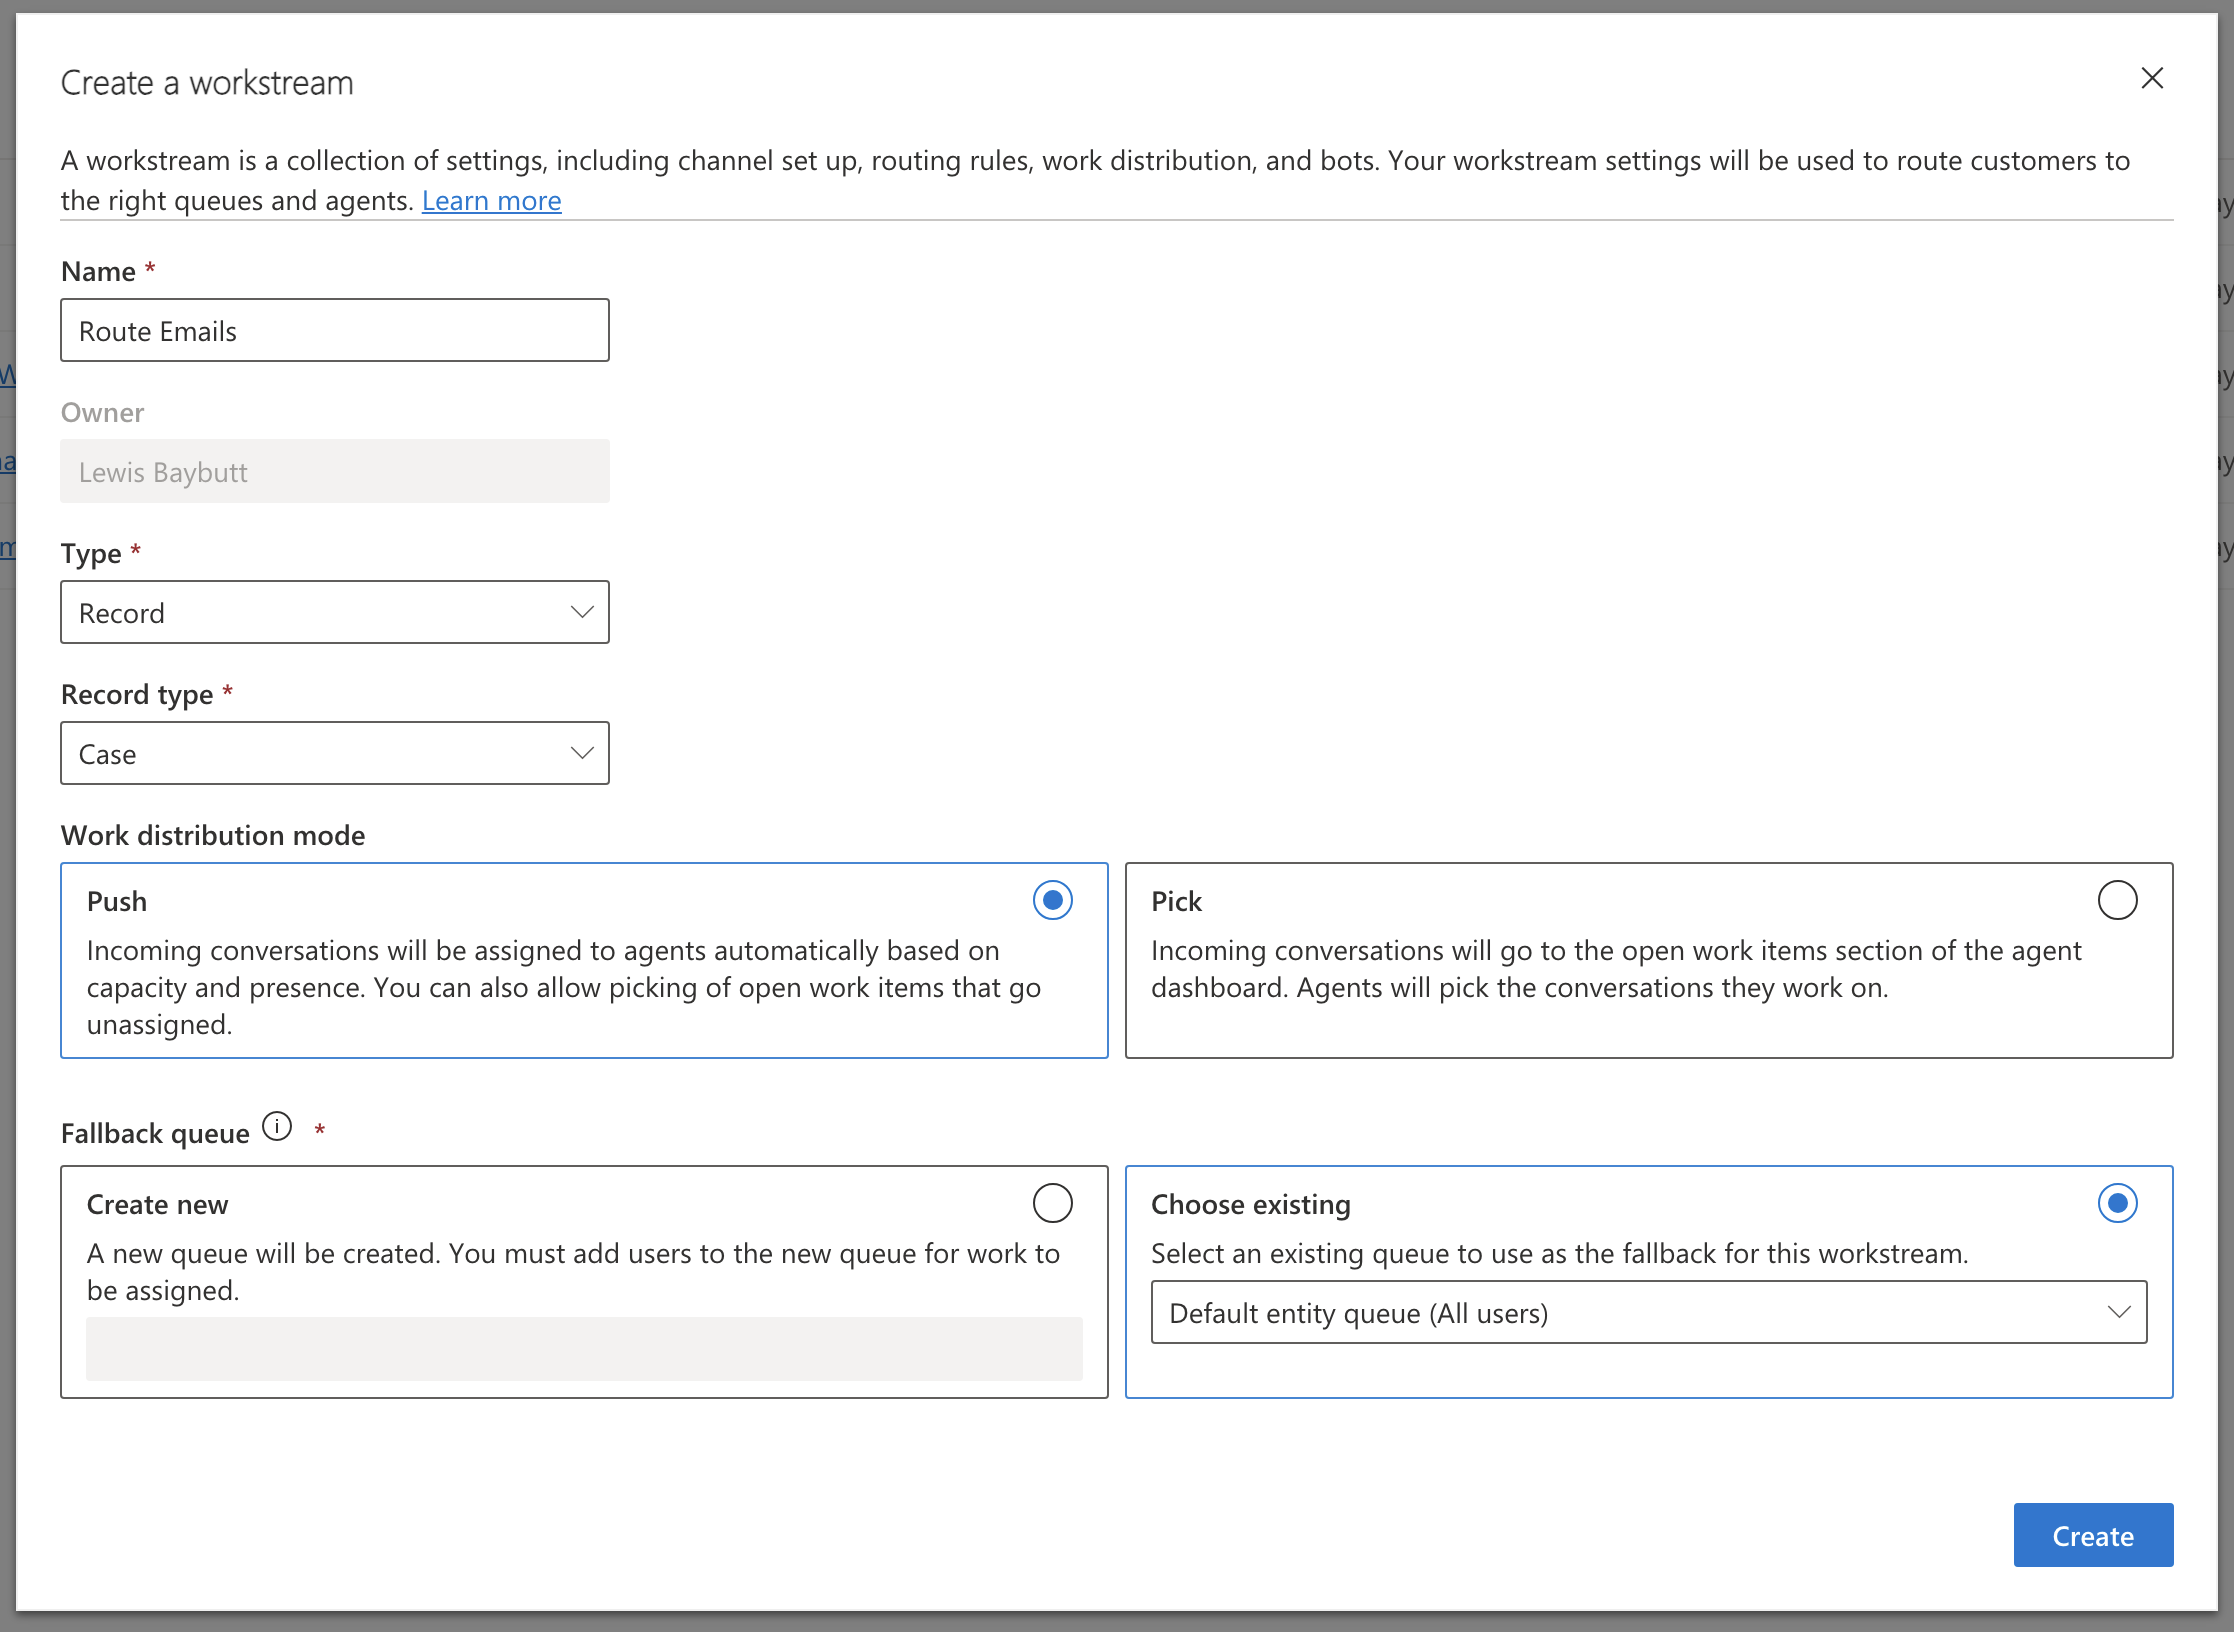
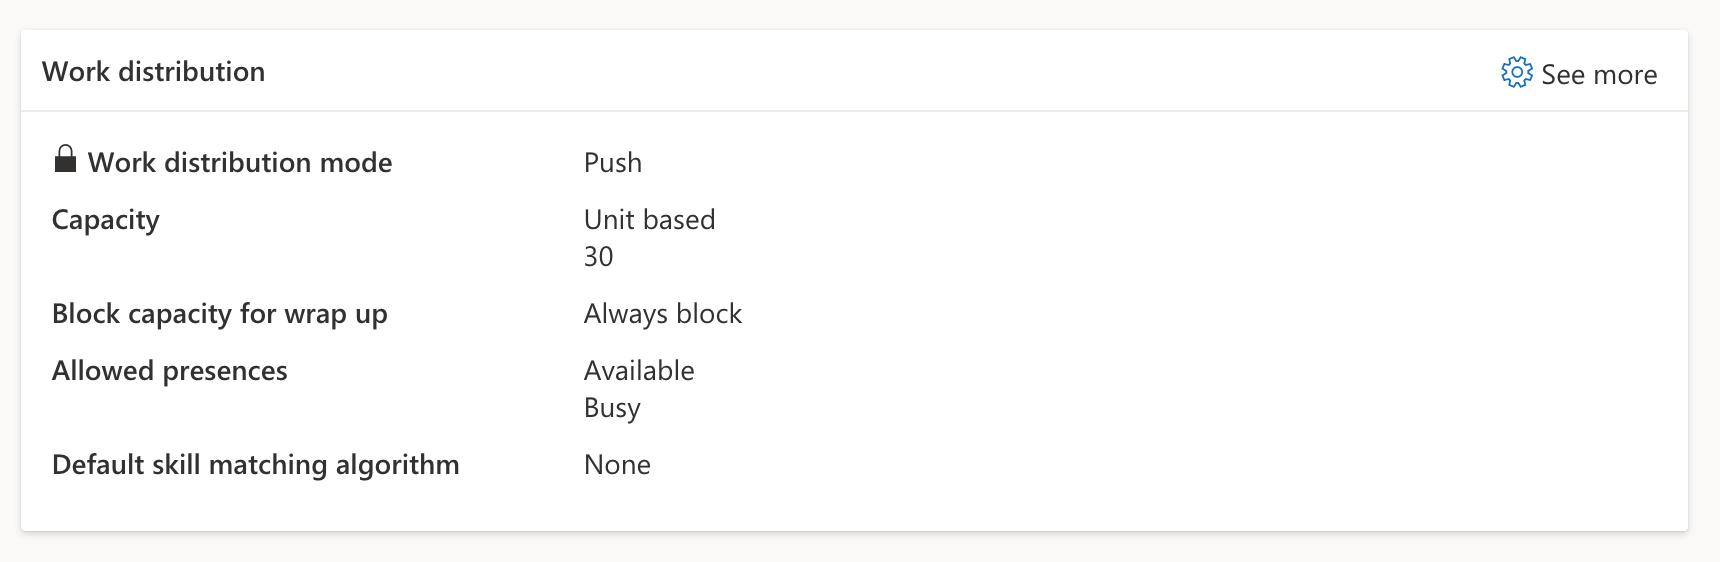
Now let’s start by creating a workstream to enable unified routing for the cases being created and update for the emails coming into Dynamics 365. Create a new workstream with a relevant name and set the type to ‘Record’. Then set the record type to ‘Case’, the work distribution mode to ‘Push’ and add a fallback queue for cases where unified routing didn’t find a queue that matched the configured conditions.
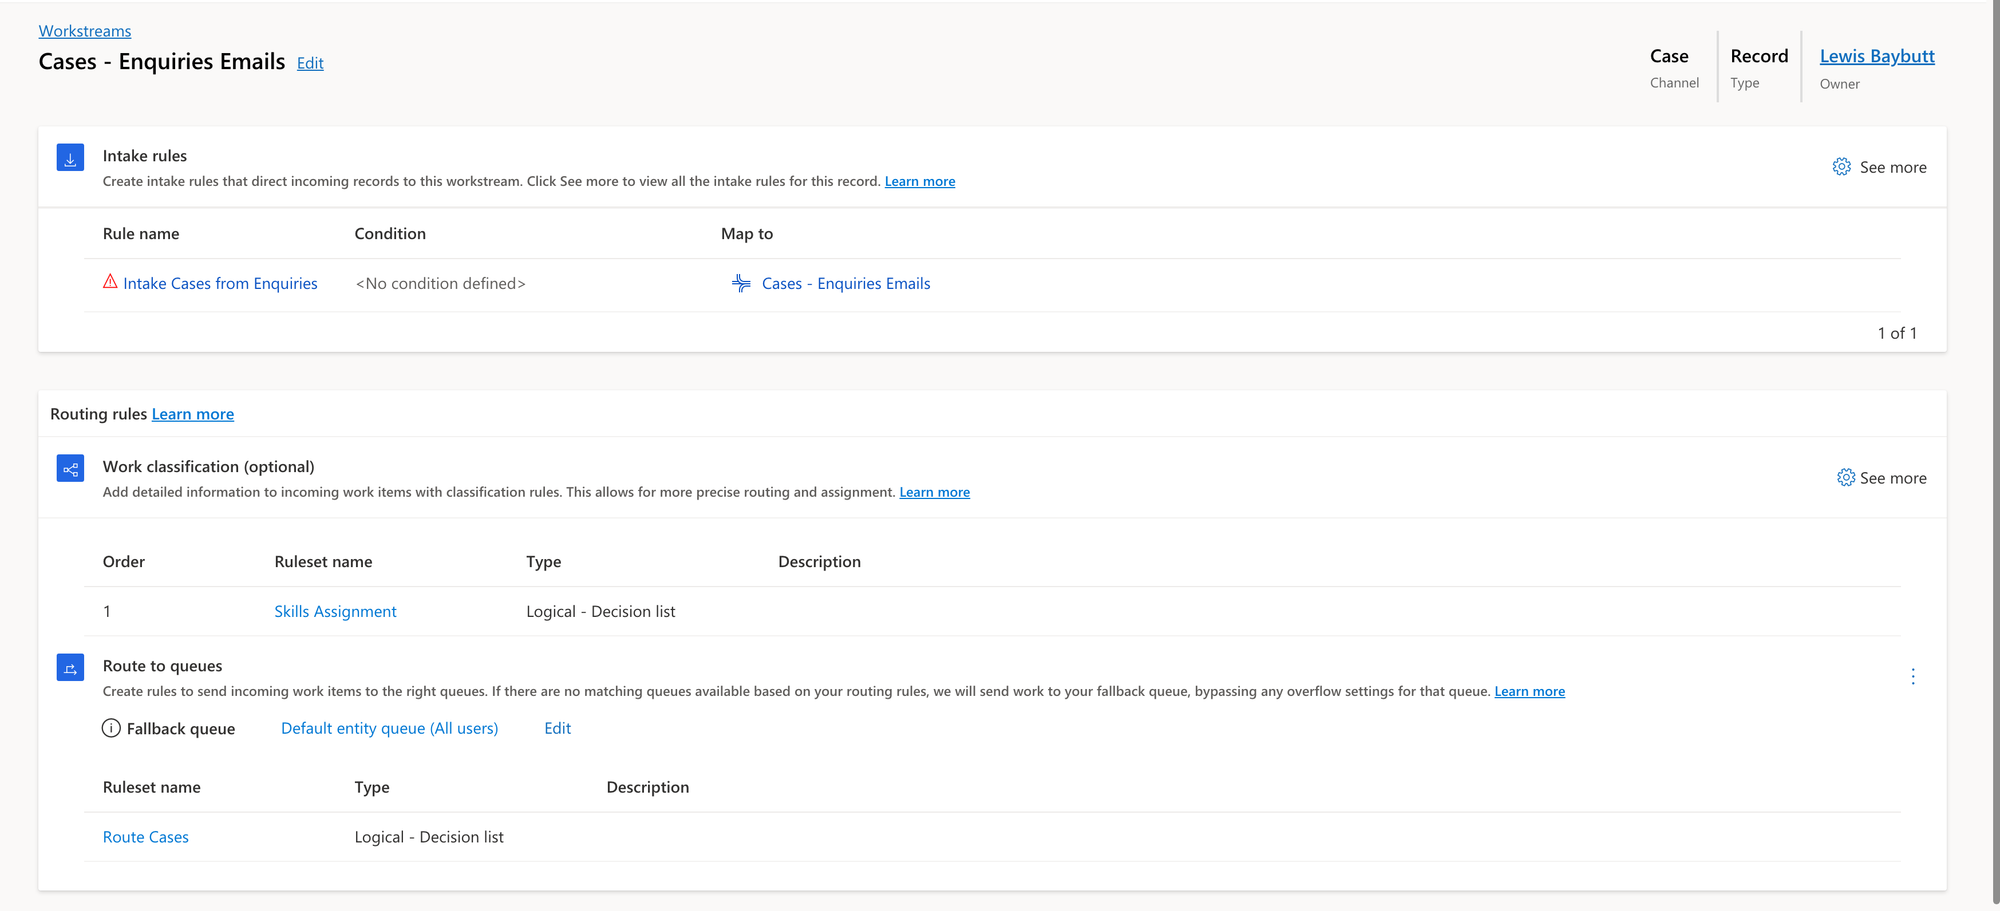
Now when it comes to record based workstreams, rather than something like a chat workstream where we could have multiple configured chat channels, here we have the option to use intake rules to decide which workstream the records of the type we’ve selected get observed by.
For me, I’m only working with a very small set of data in my workstream, so I’m not using a condition and I’m mapping all incoming records to this workstream itself, and so all of them will get pushed through the routing rules in this workstream.
Here the only other options I have, are similar to any other workstream. I’ve setup my routing rules to route everything to the same queue given the small volume I’m working with. I’ve also setup some work classification options to route specific requests to an agent with the relevant skills.
The final thing I’m going to do is suggest that an agent can only have a work item pushed to them if their presence is set to available or busy.
Testing it out!
Now let’s test things out and see what happens. I’m going to send an email to the shared mailbox and we’ll observe an agents experience here.
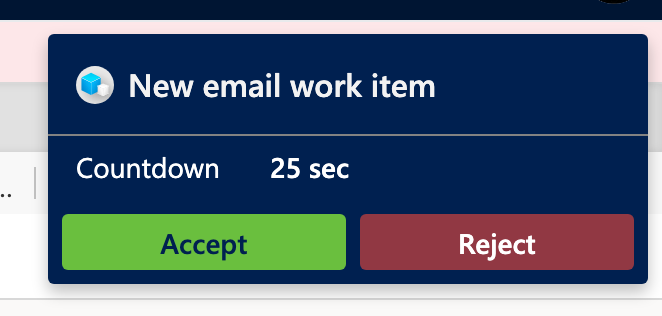
First, my agent will get a notification in Dynamics, similar to if they were about to handle a live chat with the new work item and an opportunity to accept or reject the work item.
Now if the agent goes ahead and accepts this work item, the case will open up in a new session with all the email records now becoming centred on the timeline of that case.
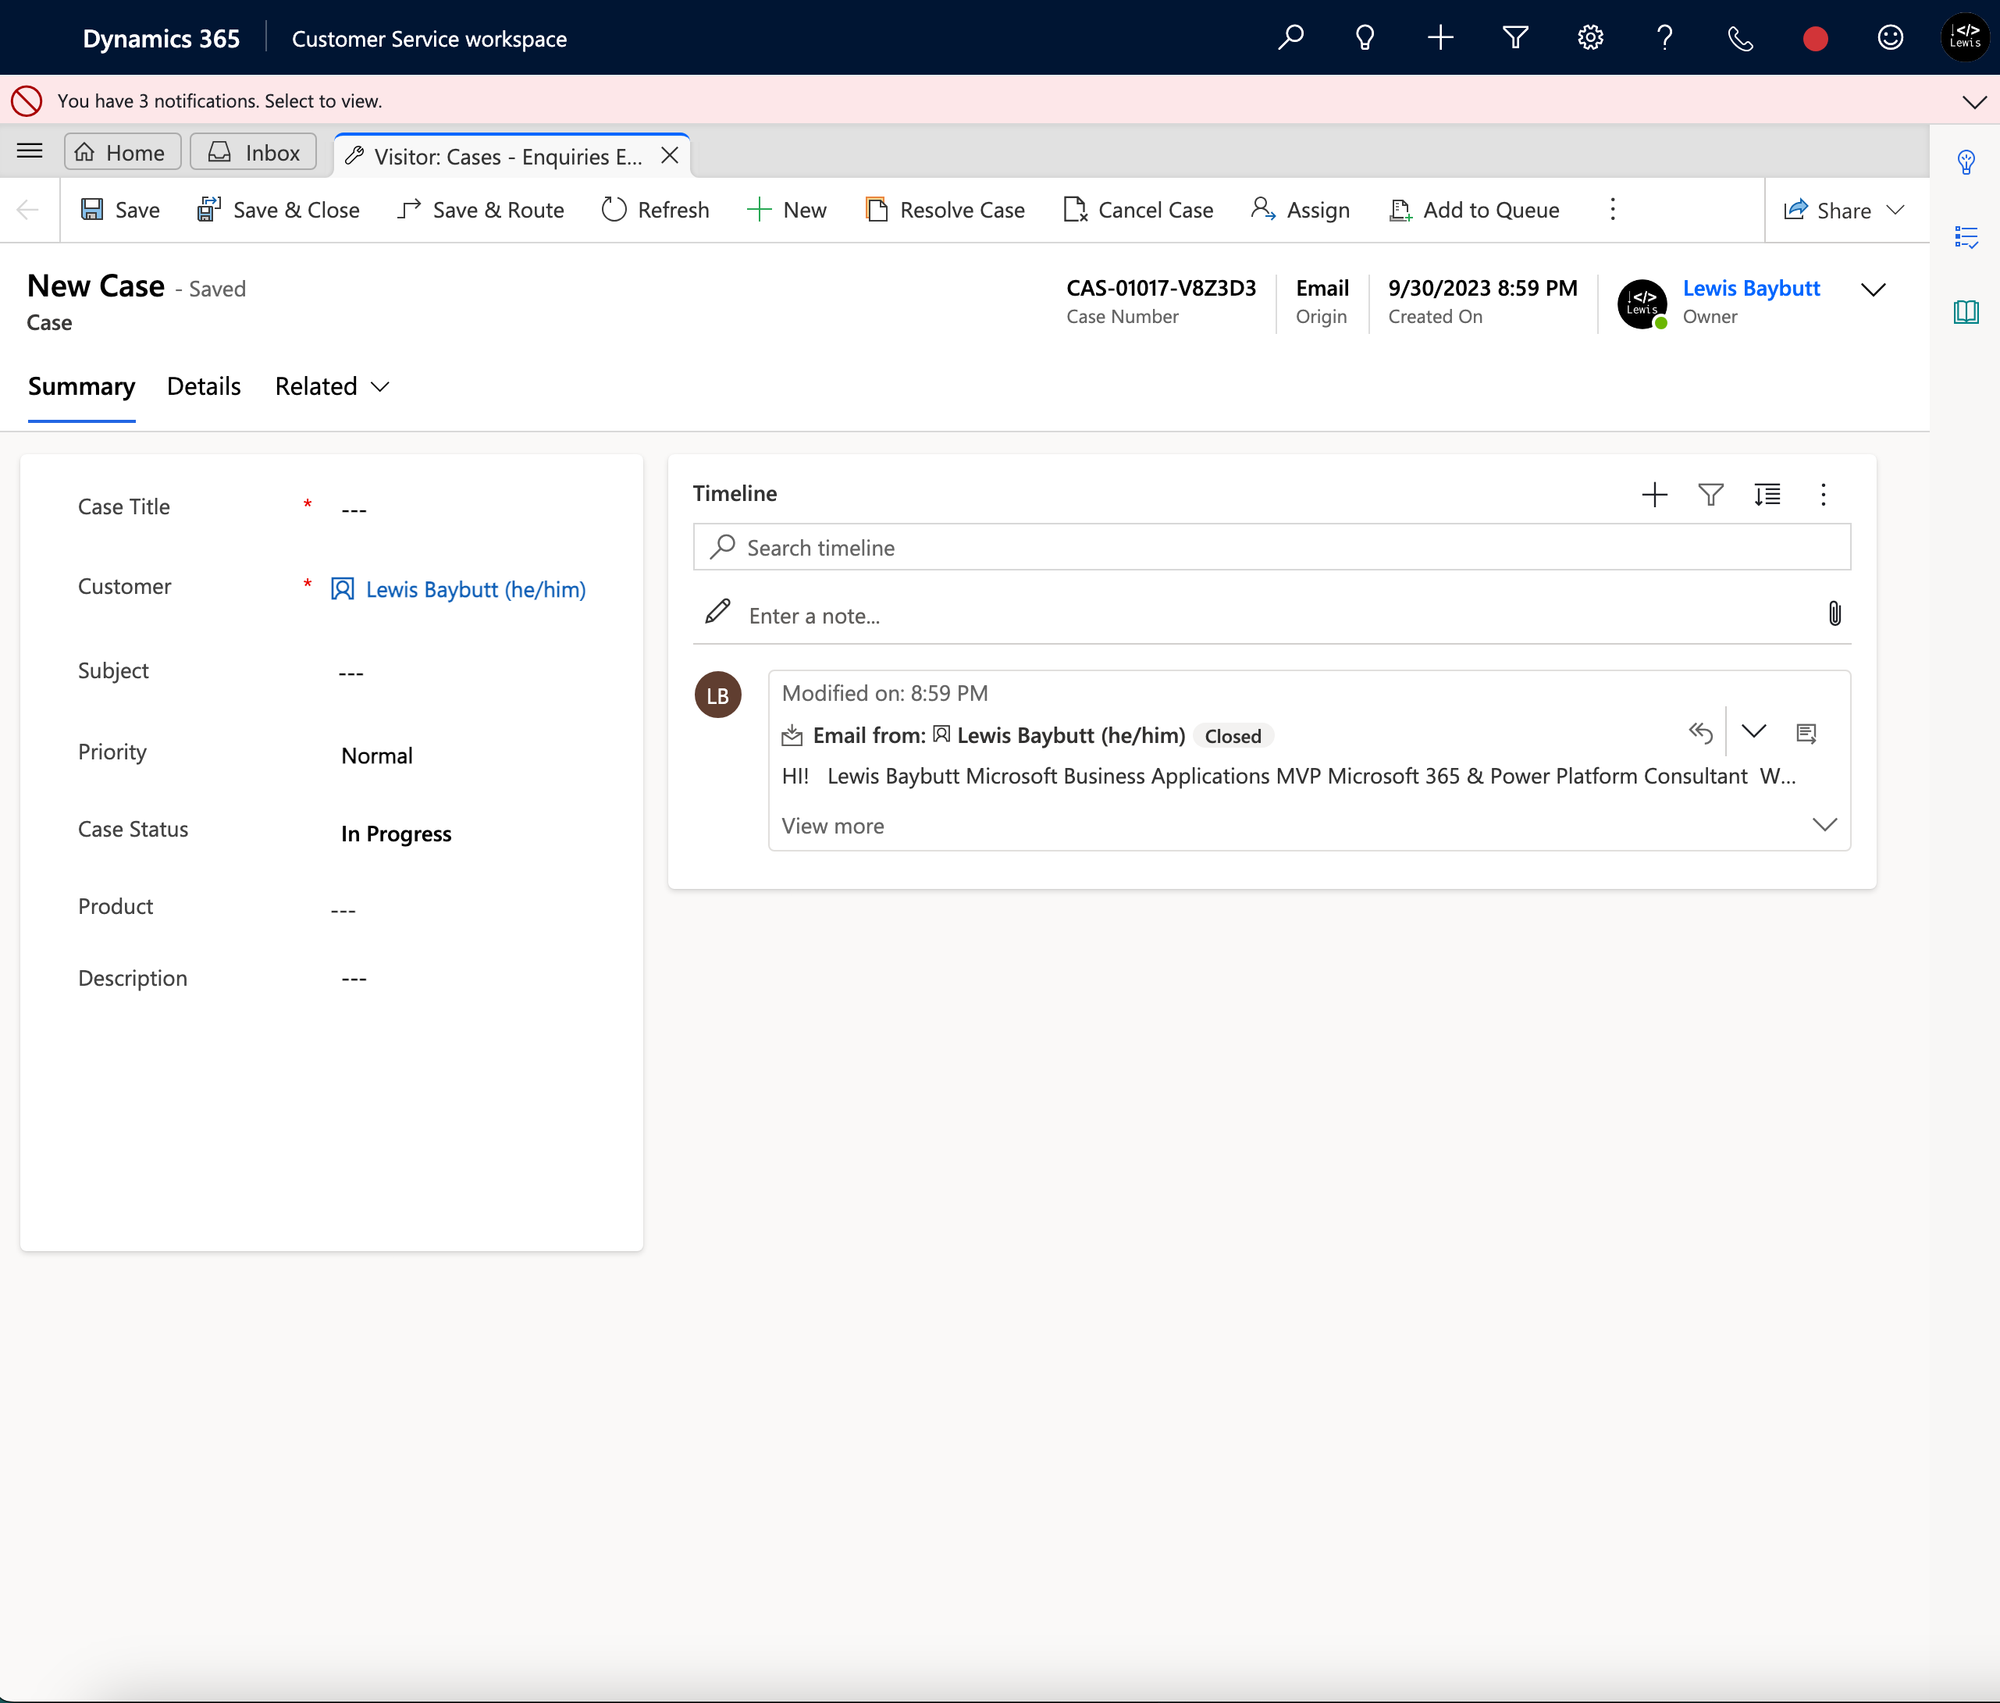
From here the agent can respond to emails and go back and forth with the customer to resolve the issue, and then when they’re finished they can resolve the case which will release their capacity again.
Overview
So, in this post we looked at a few different things to enable the routing of emails to agents in Dynamics 365 Omnichannel for Customer Service. We started by looking at how to configure an inbox in Dynamics, then we looked at creating cases and updating cases from emails coming into Dynamics, and finally we configured a workstream to route those new cases to agents to be worked on!
Did you like this content? 💖
Did you like this content? Check out some of the other posts on my blog, and if you like those too, be sure to subscribe to get my posts directly in your inbox for free!
Subscribe