Ever wondered how you can hide the ribbon that sits behind a subgrid when you come to use a custom code component (PCF) over the top of it? Perhaps you’re just displaying data in a more visual format and don’t have a need for your users to take action on the records listed?
Recently I had to achieve this, whilst using my community friend, Benedikt Bergmann’s Conversation Control! In this post, we’ll look at customising his awesome control slightly to achieve this, and we’ll end up with the control working and a hidden ribbon. 🤩
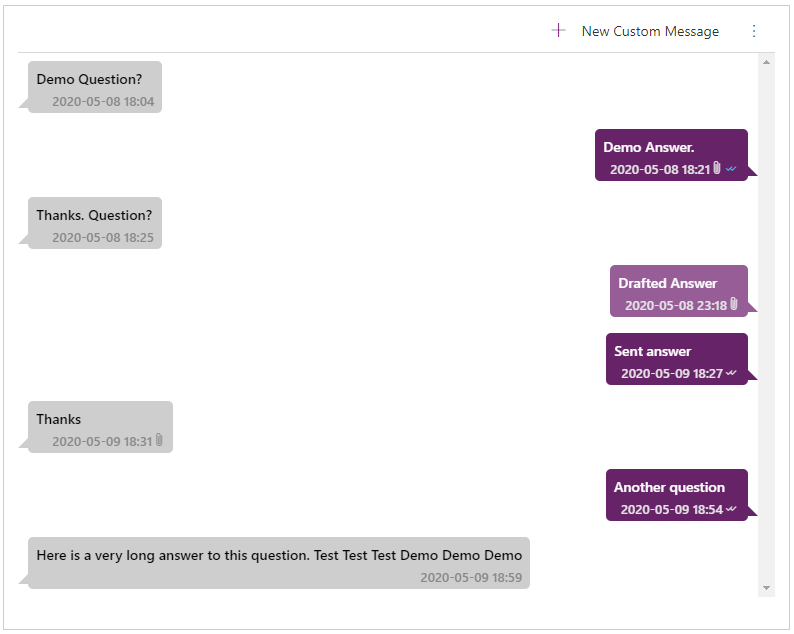
Conversation control
So, first let’s take a look at the control. We can get hold of the control on Benedikt’s GitHub here – PCF-Controls/ConversationControl at master · BenediktBergmann/PCF-Controls (github.com)
If you’d like to know how to configure the control, check out his awesome blog post below too.
https://benediktbergmann.eu/2020/05/23/pcf-use-conversationcontrol/
Downloading the code to work with
So, to be able to make the customisations to hide the ribbon, we’ll need to download, customise and rebuild the component. Let’s start by downloading the code from Benedikt’s repo. Download the code as a zip from here and unzip it somewhere on your local drive.
BenediktBergmann/PCF-Controls: Controls using the PowerApps Component Framework (github.com)
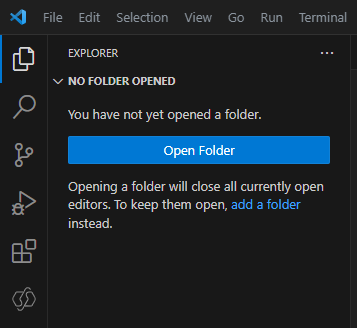
Customising the code in VS Code
Now we need to open the files needed in VS Code. Select open folder in the explorer in VS Code
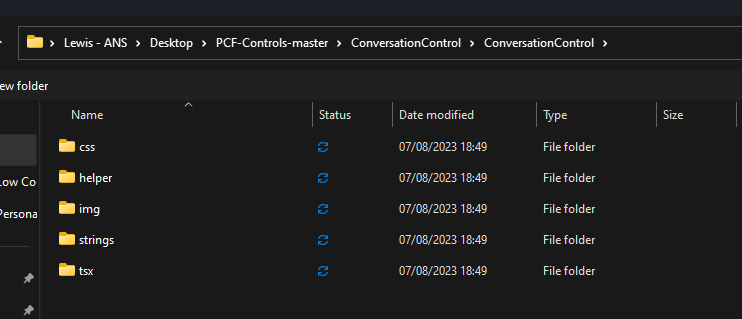
Then open the ConversationControl folder within the parent folder ConversationControl which is further in the PCF-Controls-master folder
Now open the ControlManifest.Input.xml file

Dataset customisation
We need to change something in the <data-set> which is nested in the cds-data-set-options. Change the displayCommandBar property to have a false value.

Now with the change, the manifest should look more like this…
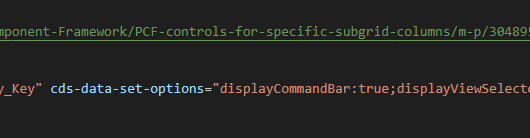
<data-set name="dataSetGrid" display-name-key="Dataset_Display_Key" cds-data-set-options="displayCommandBar:false;displayViewSelector:false;displayQuickFind:false"></data-set>
Change the name – optional
Now if you’d like to install the customised control alongside the original control from Benedikt, you can change the name of it. In the explorer use the search to find the namespace over all of the files to start with which at the moment is “BeBeControls”
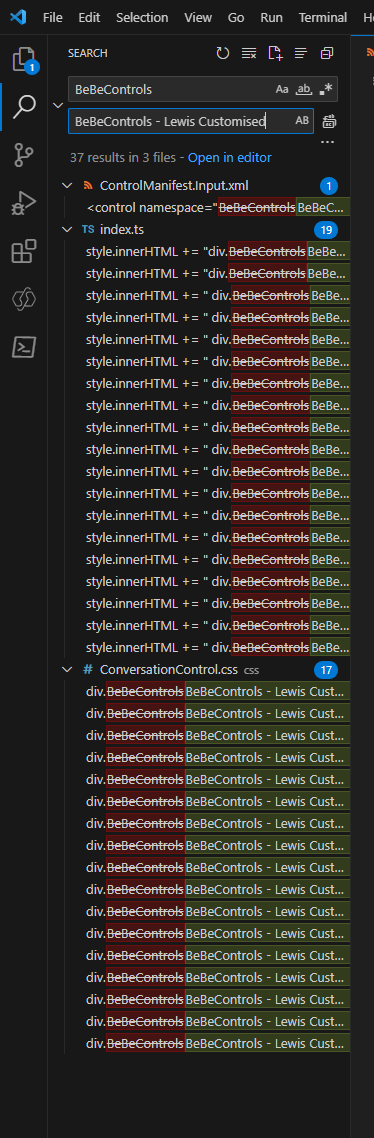
Now rename the constructor, then the display-name-key and description-key.
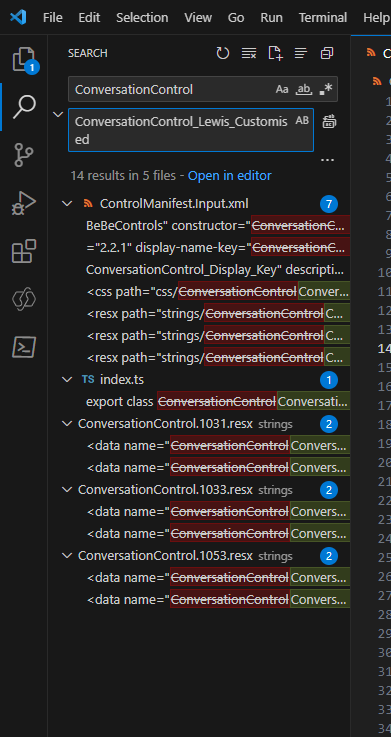
Finally do a search for Conversation Control, which should highlight the display name of the control in one of the .resx files. You can change the value here to update the display name of the control that you see when you add it to a form.

Building the control
Now we need to build the code we have just customised. Make sure you’ve saved all of the files you just customised and we’ll now use the terminal to build things.
In the terminal make sure you’re navigated to the folder we have open in VS Code which by default you should be. Now run the following command.
npm installThis will now setup the project build tools so we can build our code.

Next in the terminal run the following command to start the build.
npm run buildPackaging the code component
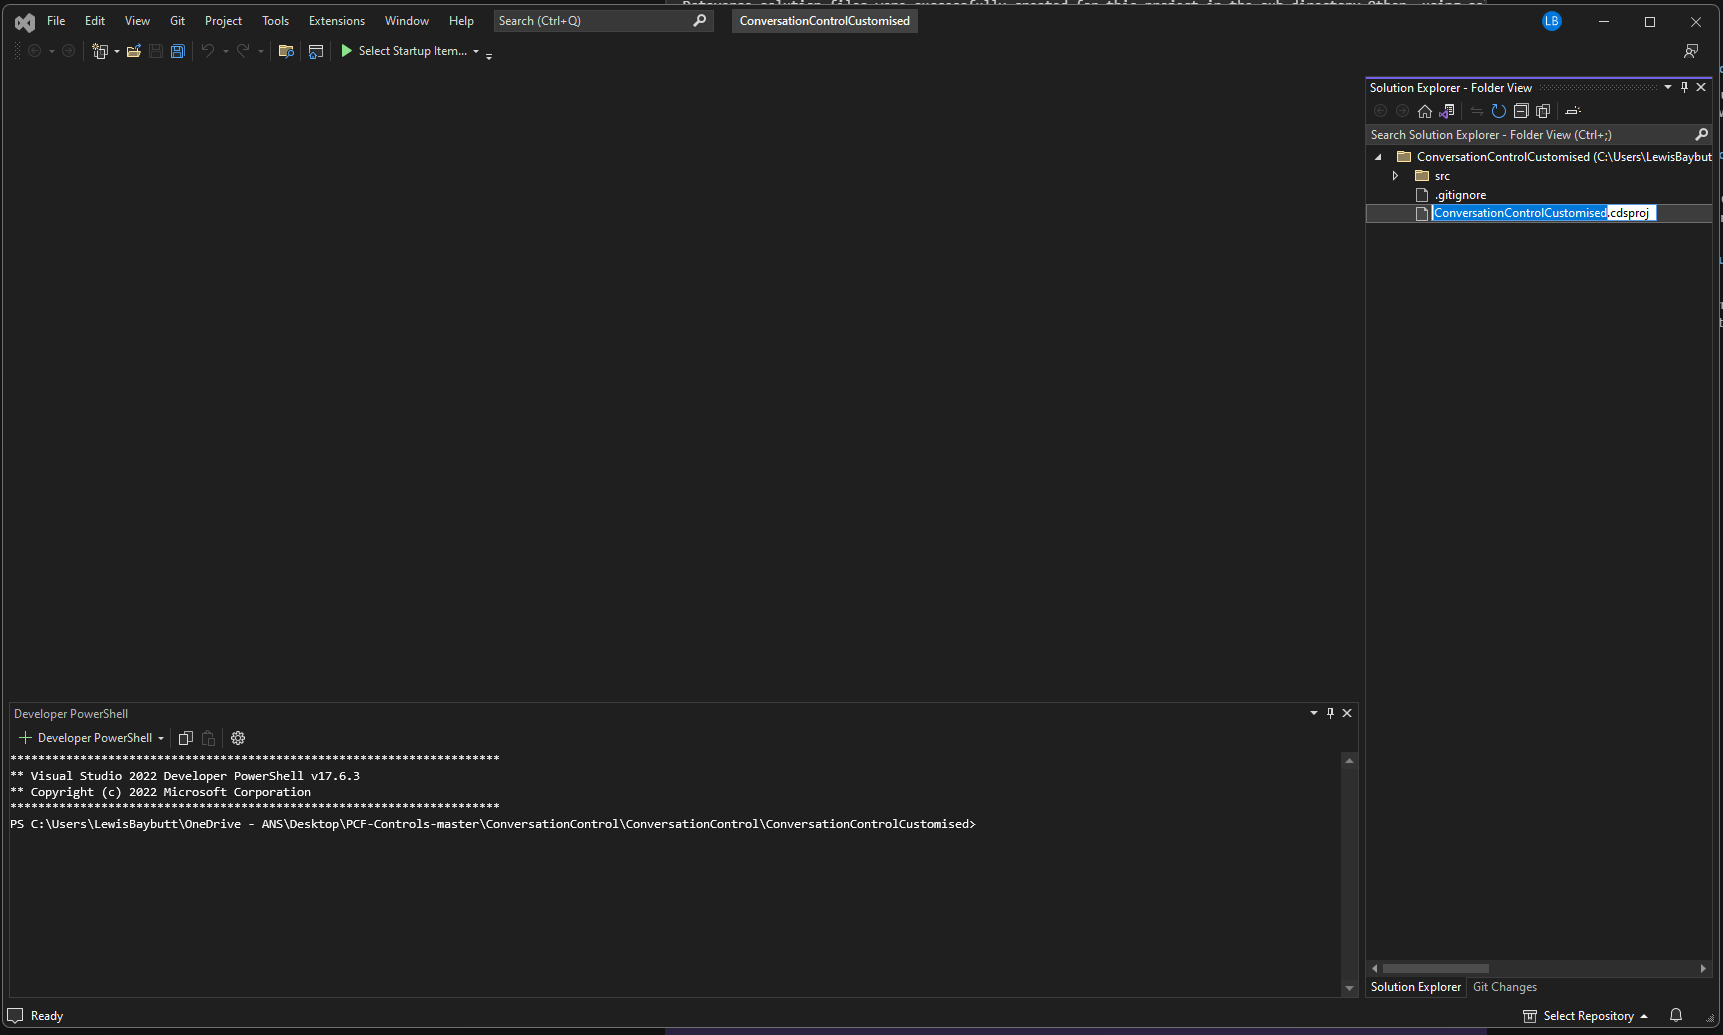
Now we need to package our code component. In the terminal create a new folder and then navigate into it using these commands.
mkdir ConversationControlCustomised
cd ConversationControlCustomised
Now create a new solution project using the following command
pac solution init --publisher-name Samples --publisher-prefix samplesReplace the published name and prefix in the code above before running it in the terminal.
Now we need to add a reference to the location where the component is using the following command.
pac solution add-reference --pathThe file you need to use is stored in the parent folder to the one we opened in VS Code and is the PCFPROJ file.
You should then see a message notifiying you that the operation was successful.

Now I’m going to head to visual studio to build my code. I’ll open the same folder I was just in within the terminal in VS Code.
Now simply run the following command…
msbuild /t:restoreFollowed by this command once the above has completed…
msbuildNow you should have your solution zip file ready to import in the ConversationControlCustomised\bin\debug folder. Grab it from there and import it into your environment to use it!
Configuration
Want to now use the control on your subgrid? Simply follow Benedikt’s guidance here to configure his control, or configure another control using its relevant documentation if you didn’t make the customisation to this control.