

Woah! On to a new blog series? That’s right! Recently on my blog, I’ve been talking lots about contextual data and taking advantage of the wider digital ecosystem, and broader ecosystems using APIs and services such as Microsoft Graph. 🤩
There are now 33+ posts on my blog around contextual data and this topic, and so I’m going to start to move onto something new. In this new series on my blog, we’re going to focus on all topics around the Power Platform Tools, Power Platform CLI and more!
In this post, we’ll look at how to install the Power Platform Tools for working with things like configuration migration, plugin registration and more 💖
Visual Studio Code
So the first thing we need to do to get working with Power Platform Tools, the Power Platform CLI and tools such as the configuration migration tool and more, is to install the Power Platform Tools extension in Visual Studio Code.
If you don’t already have Visual Studio Code installed on your machine, you can get hold of it here.
Visual Studio Code – Code Editing. Redefined
Once you’ve got visual studio code installed, head to the extensions tab on the left hand navigation and search for Power Platform Tools, you’ll then want to install this extension which will install the Power Platform CLI for you too.
Note for macOS users
To enable the successful installation and use of Power Platform CLI when working with macOS you’ll need to insure you have .NET installed.
Find more information regarding installation for macOS here – Microsoft Power Platform CLI – Power Platform | Microsoft Learn
Power Platform CLI
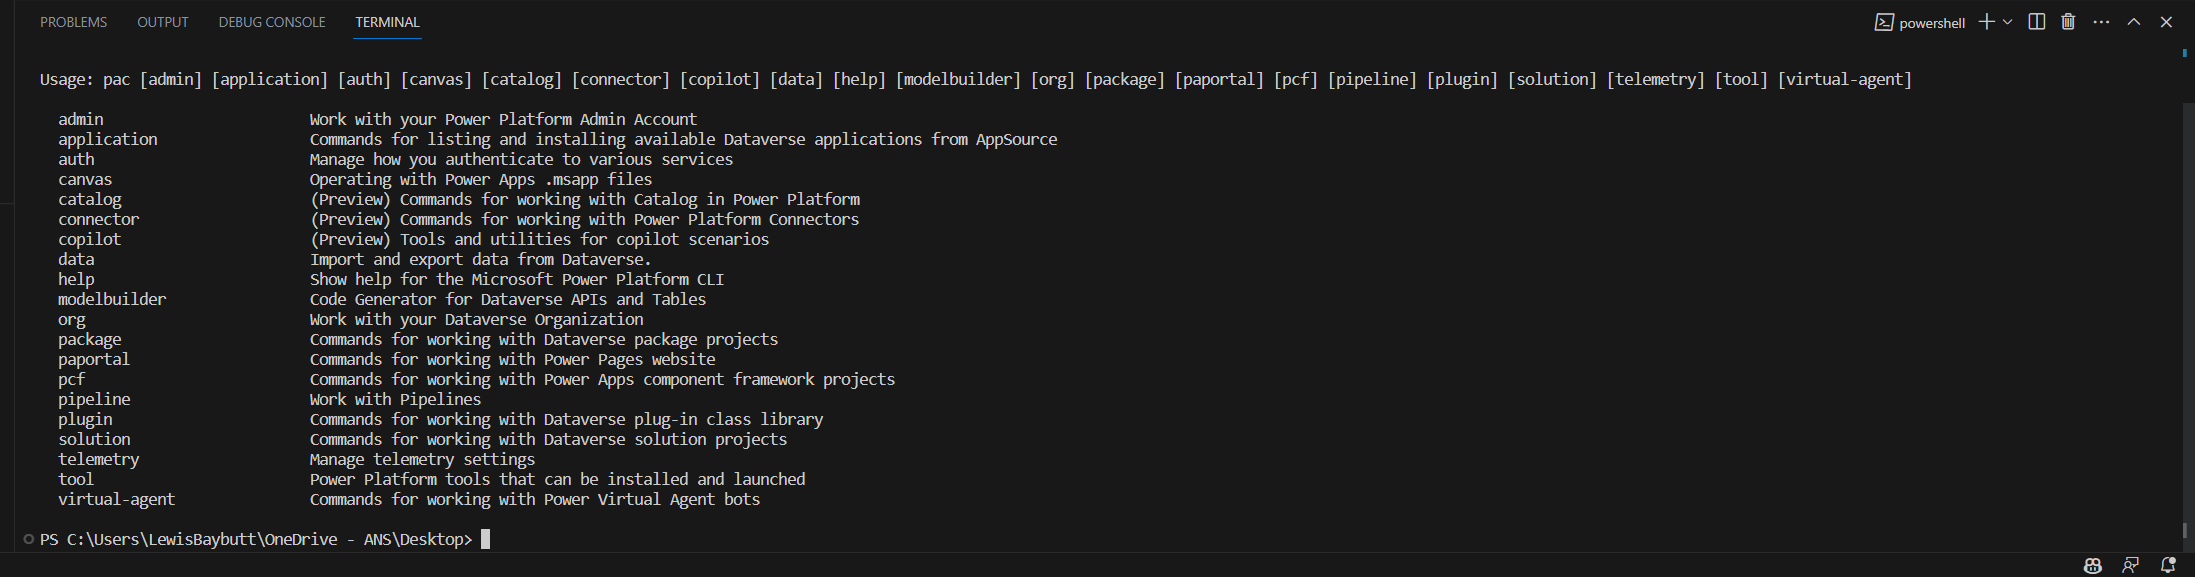
Once you have added the Power Platform Tools extension to Visual Studio Code you can check to see if it is working by typing the following command in the terminal.
pacYou should then get a response which highlights the commands you can make using the Power Platform CLI if things are installed correctly.
Installing Power Platform Tools
Now if you’re working with Windows as your OS, there are a number of additional tools (Dataverse development tools) you can install on your machine for working with Dataverse and Dynamics 365 including the following:
- Configuration Migration Tool
- Package Deployer
- Plug-in Registration Tool
To install these tools you can use the following commands in the terminal.
For configuration migration tool:
pac tool CMTFor package deployer:
pac tool PDFor plug-in registration tool:
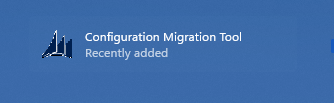
pac tool PRTBy running these commands you should end up with the Power Platform Tools installed on your PC. For example, by installing the configuration migration tool the terminal tells me that the installation is complete and a shortcut was saved in the start menu. I can then find configuration migration tool in my apps.
Overview
In upcoming posts on Low Code Lewis, I’m going to be sharing how you can get to grips with using some of the tools that we’ve talked about in this post and installed today. If you had trouble getting any of the tools we talked about in this post installed, let me know in the comments and I’ll see if I can suggest anything that might help.
Be sure to subscribe to my blog to get