Is your model-driven app looking a little bit ‘standard’? Or, do you potentially need to apply company branding to your application? In this post, we’re going to look at how you can apply a theme to your model-driven app to make minimal adjustments to the look and feel. Keep in mind that this only changes very few UI aspects of your application such as colours and a logo, but it can allow you to get closer to matching your brand.

Advanced Settings
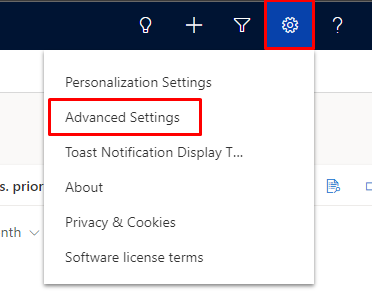
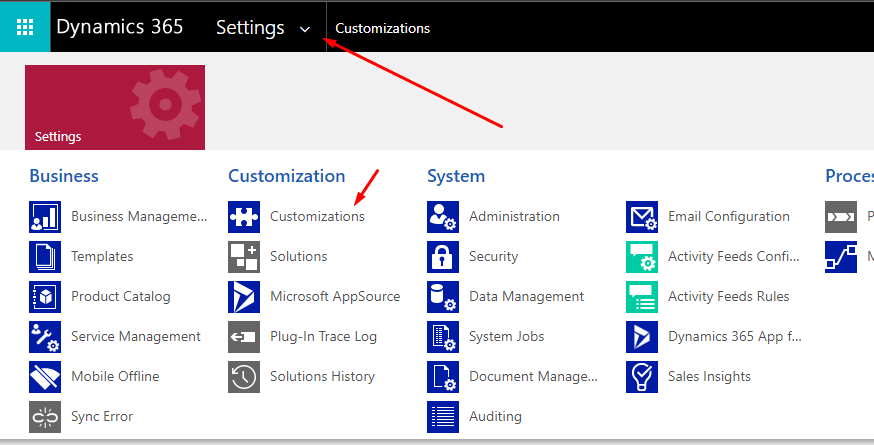
First you’re going to want to head to your application within Power Apps, it could be a custom application or a Dynamics 365 CE application. Next we want to head to the gear icon in your app, and select advanced settings. Then select the drop down within advanced settings to open the range of options and finally select customizations.

Creating your theme
Next we want to select ‘themes’ from the options on the customizations screen. On the themes view, you can either utilise and publish one of the existing CRM themes available, or you can create your own to apply your own look and feel or your company branding.
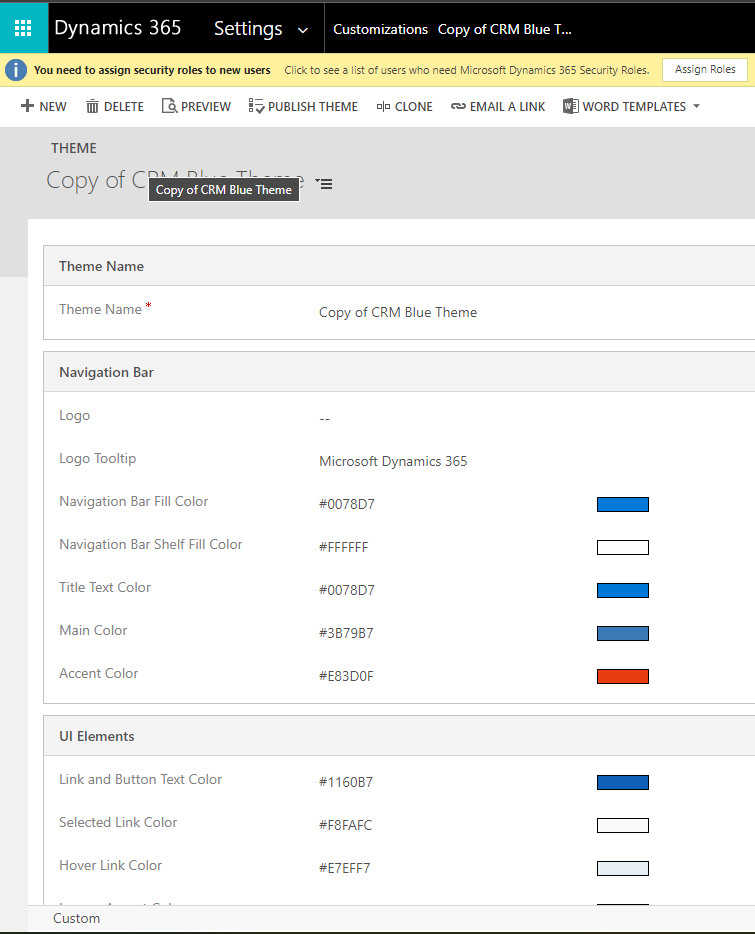
To create your own theme, click new to create a new record or you can create a copy of an existing theme record to edit and change.

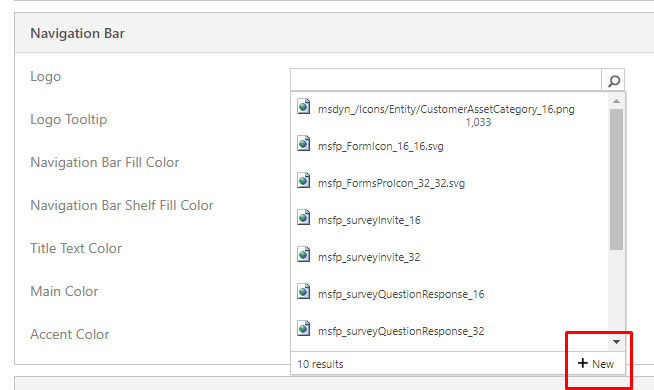
So now we have our theme record ready to make our changes. Here we can changes various things such as our app logo, the logo tooltip, navigation bar colours, main colours and more. To apply a logo you will need to create a new web resource which you can easily do by clicking the search icon that appears when you hover over the logo field, then click new, upload a file and publish your web resource. Then you can select this as your logo.

Publish and apply your theme
Now that you’ve created your theme, you can click preview to see it be applied in your current window, then you can publish the theme by clicking publish theme if you’re happy. Which will then apply it across your model-driven apps in the environment you’re working in.


