

In this blog post, we’ll take a look at how you can create Power Automate flows that are button triggered from selecting a record in Dynamics 365 or in a model driven app built with Power Apps! Need a super simple way to run a flow thats based on a record you’ve selected? Keep reading to find out how.
My Solution
So let’s start by taking a look at my simple solution before I create my Power Automate flow. In my solution I simply have one table that I’m working with and a model driven app which utilises this table, which in my case is the Account table.
My app is simply just going to be for managing my accounts.

Building the flow
So, now lets take a look at how we can build the flow. Let’s start by clicking new in our solution and selecting to create an instant cloud flow.
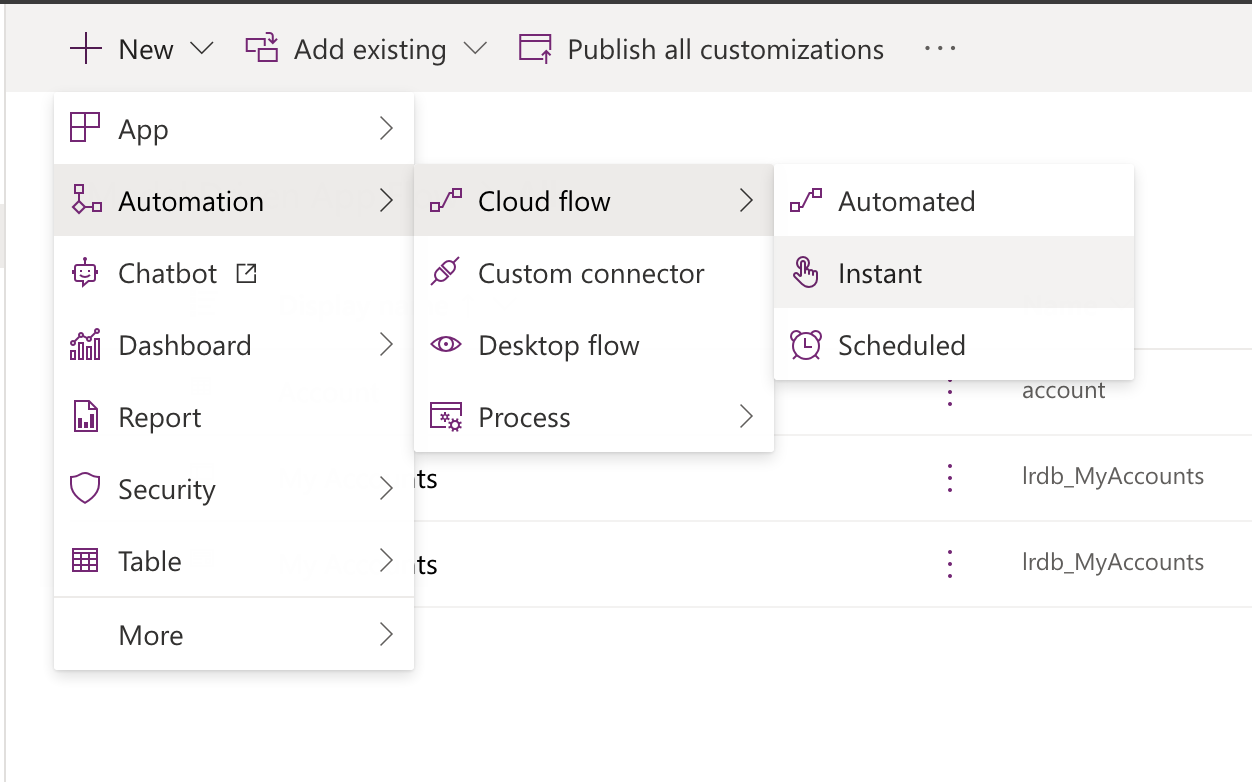
Now give your flow a name and select the Microsoft Dataverse trigger, “When a row is selected”

Now we can start building our flow!
The trigger
Now let’s take a look at configuring our trigger. Set the environment to default and it will work on the current environment that the flow is in.
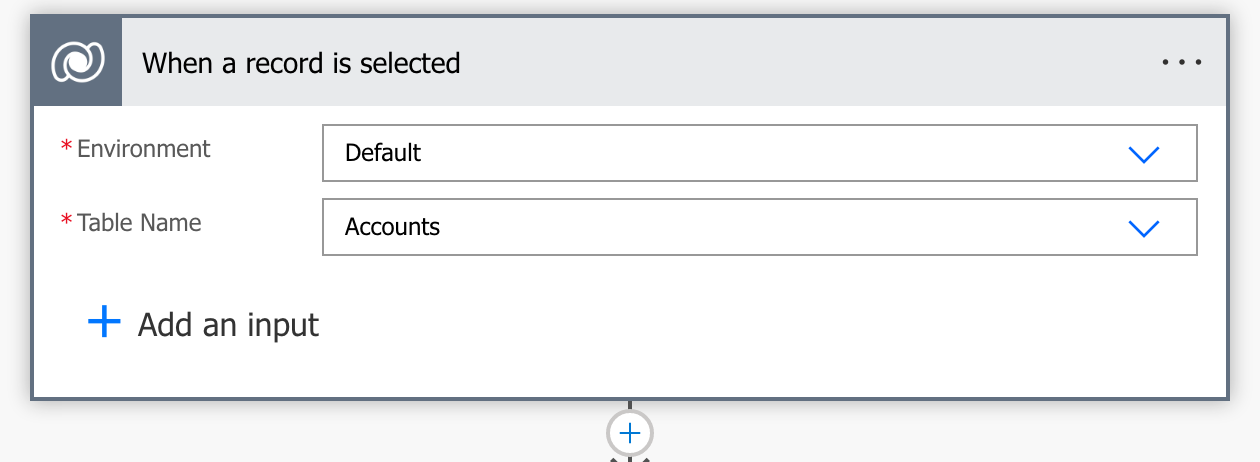
Once you’ve done that simply select the table that you want to trigger the flow on and that you want dynamic content for from your selected record.
Now simply add flow actions to your requirements to build out your automation process!
Additional inputs
Now lets say there’s additional information you want your users to provide that you can’t already get from the data in one of your records. Let’s look at how to provide our users with an interface to input further information that we require from them.
To do this, we will add additional inputs to our flow trigger.
Let’s select add an input under the table input on our trigger. Select a data type based on the information we’re collecting and give the input a name.
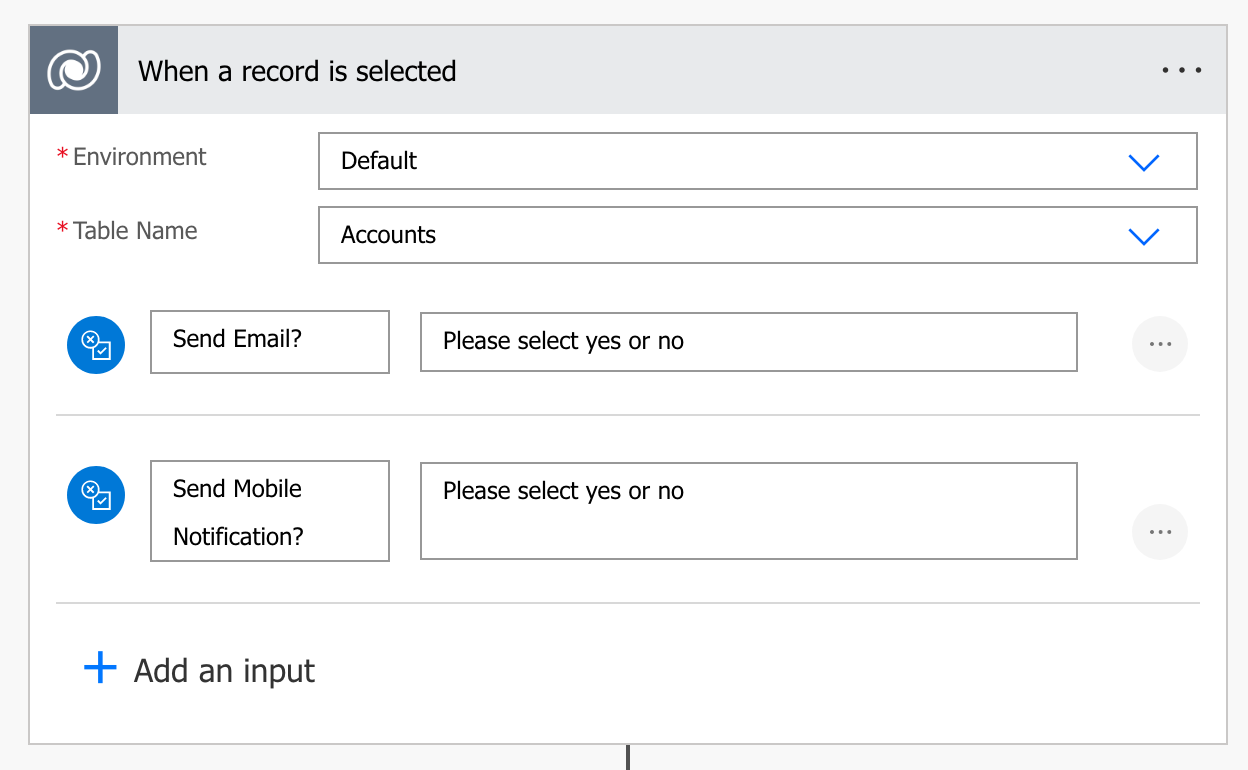
I want my users to be able to send account alerts but I want to give them the option as to which kind of alert they are sending. So I’m going to add two inputs to my flow, one to allow them to set an email to true or false and one to set a mobile notification to true or false.
Then I’ll be able to use these later on in my flow to do something like create a condition where certain actions only run based on a previous data value, in this case those inputs being true.
Testing
So now that we’ve configured our flow, you’ve added some actions based on your process means, and we’ve taken a look at how to get additional information from our users of all sorts of types, let’s see what it’ll look like to our users when they need to trigger one of our automated processes.
I’m going to head back over to my model driven app for managing my accounts, I’ll select a record in the account table and then I’m going to select flow.
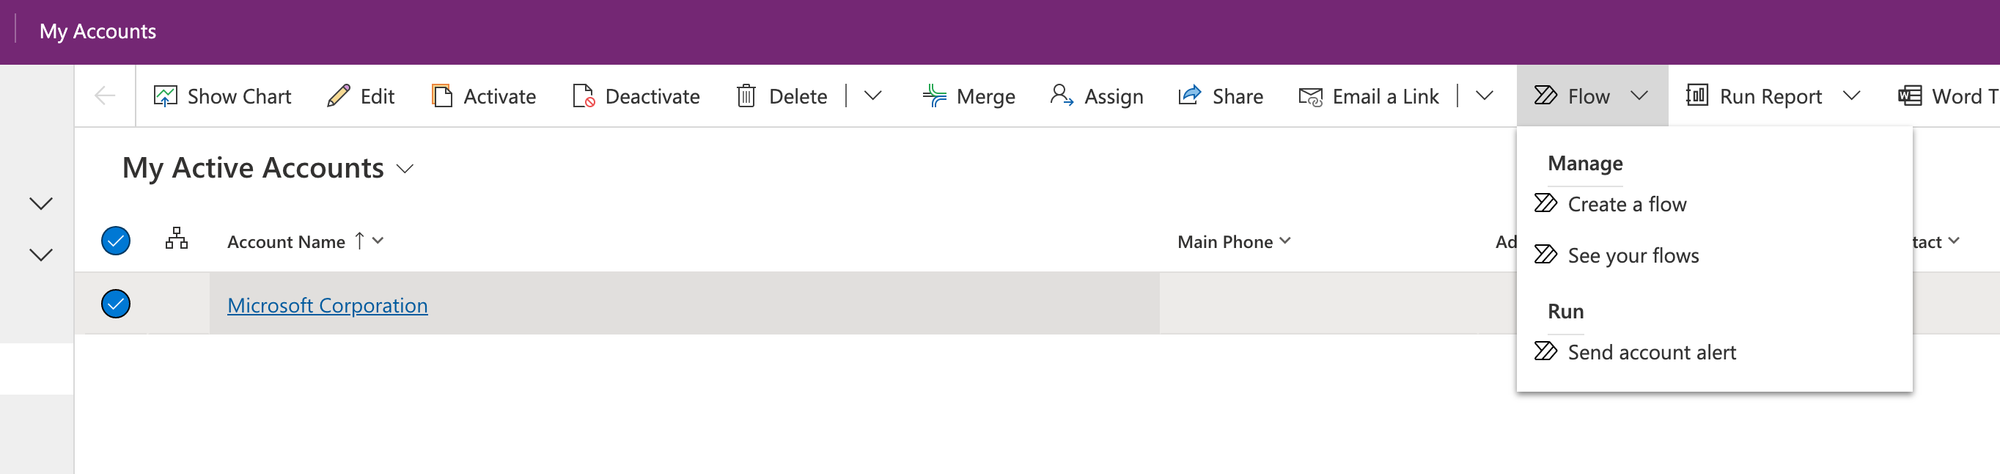
And there you can see I have my flow to send an account alert. Let’s select this and see what happens…
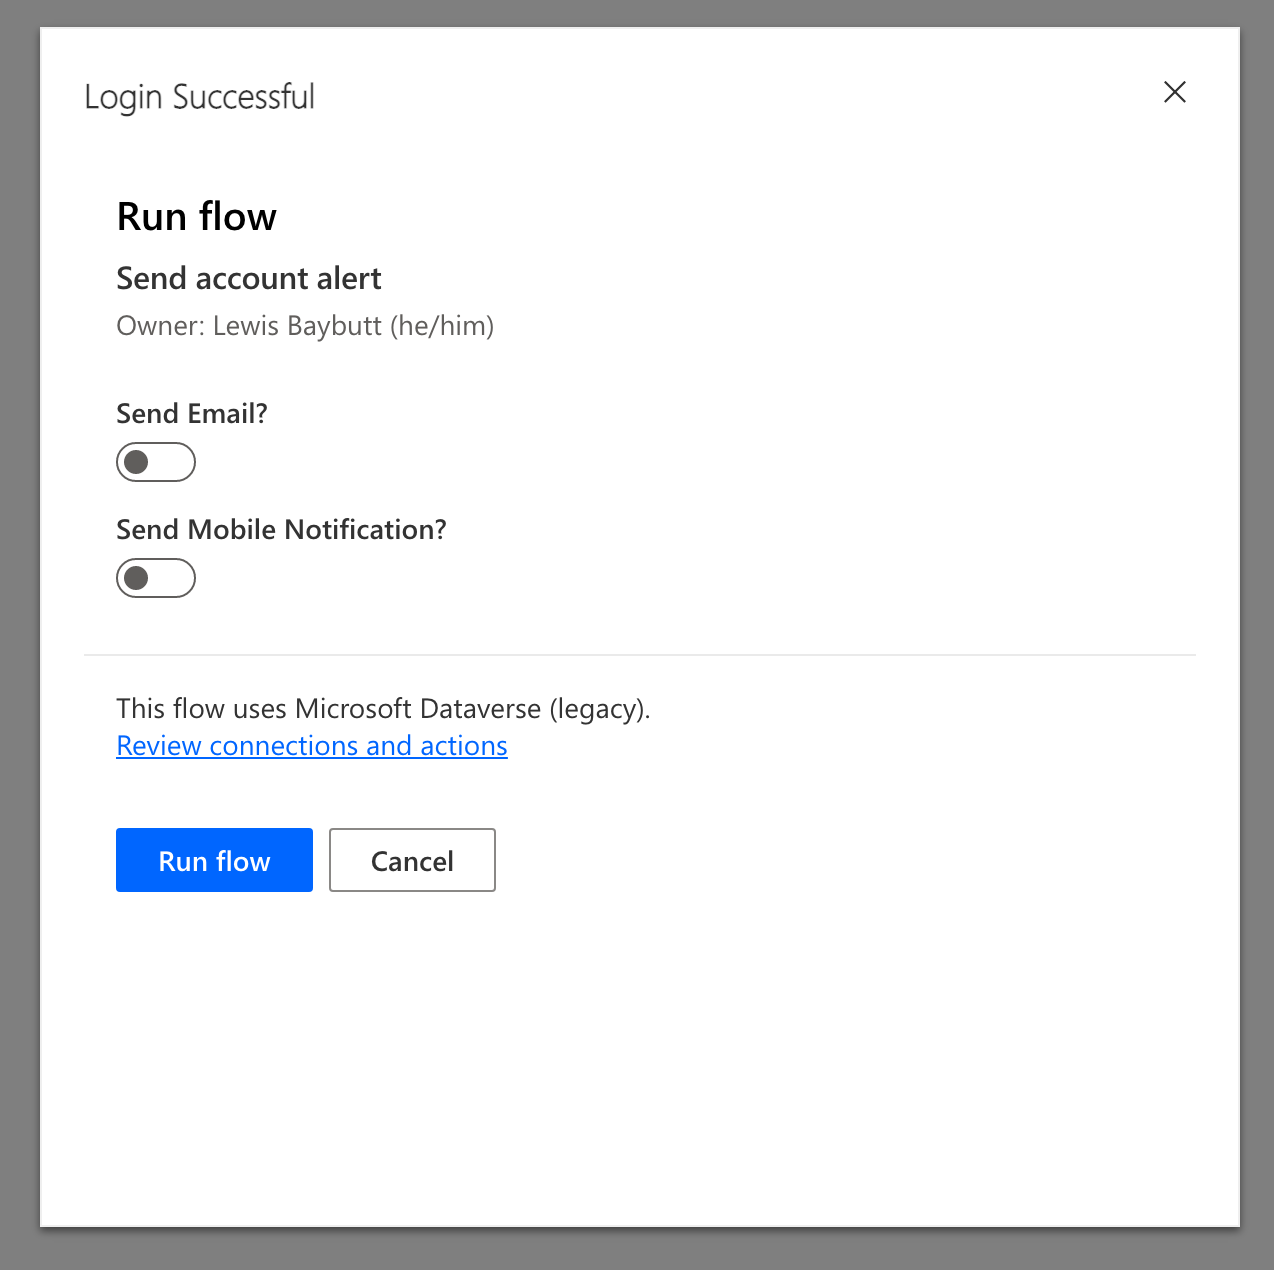
And there you can see I have a dialogue to add my additional information my flow needs to run, then once I’ve added this information I can select Run flow to trigger my process.
Overview
And that’s it! It’s really that simple. But… if you didn’t quite understand anything in this guide at all, just let me know in the comments below and I’ll see if I can help further.