

Call a Clinician is here! 🤩 I am now publishing the solution as a sample on my GitHub for you to download and import into your own Power Platform environments to play around with, allowing you to either use this in your organisations, or just get a feel for how we can work with contextual data on a basic level.
Solution Overview
Call a Clinician is a healthcare industry solution which allows clinicians to call on the support of other clinicians with specific skillsets without having to waste time executing manual and lengthy tasks. This solution assesses whether a clinician has the skill being looked for or not and returns information on their availability as ‘context’ which is driven by the use of the Microsoft Graph API.
This is a Low Code solution built on Microsoft’s Power Platform and is dependent on organisations having adopted Microsoft Cloud and Microsoft 365 as their cloud and productivity suite. This solution requires premium Power Apps licenses to be available to consume the applications within the solution.
For more information on the solution see the overview documentation below.
Deployment Guide
In this post, we will primary cover how to install and configure the solution. To get started, download the solution from this repository.
lowcodelewis/Low-Code-with-Ecosystem-Context—Solutions
Once you have the solution file, just keep it safe in your downloads whilst we setup a few other things.
Create the app registration
This solution utilises Microsoft Graph within a custom connector for getting presence information about users. We will need to handle authentication for working with Microsoft Graph which we will do with an app registration and Graph delegated permissions against it.
Follow the steps below adding the Presence.Read.All delegated permission for Microsoft Graph.
- Create an app registration in Azure Active Directory
- Add the Microsoft Graph delegated permission under API permissions for Presence.Read.All
- Add the following Web platform Redirect URI – https://global.consent.azure-apim.net/redirect
- Create a client secret and note down its value
- Note down values for the app registration client id and the tenant id.
You should now have three values.
- App registration client id
- Tenant id
- Client secret value
Find more information on creating app registrations here
Create the Azure Key Vault
Now you’ll need to create a key vault to store your secret in that the custom connector in the Call a Clinician solution can reference.
To do this follow these overview steps:
- Create or use an existing resource group in Azure
- Ensure that the subscription the resource group is held in has the Microsoft.PowerPlatform provider registered
- Create a key vault in that resource group which utilises RBAC as the access configuration
- Add the Key Vault Secrets User role to both the user who will install the solution and create the reference to the key vault, and the Dataverse service principal (00000007-0000-0000-c000-000000000000).
- Create the secret you copied earlier from the app registration in the Key Vault.
Collect the following values from your setup:
- Subscription ID
- Resource Group name
- Key Vault name
- Secret name
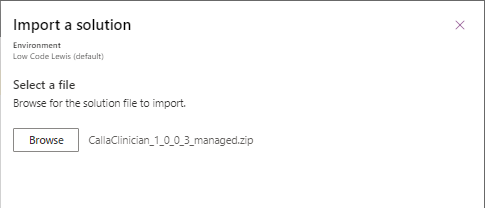
Import the solution
The final thing to do, is import the solution! Go to make.powerapps.com and select the environment you want to put the solution in. Then select the solutions area and select import solution. Then browse and select the solution file you installed from my GitHub repository earlier and continue.
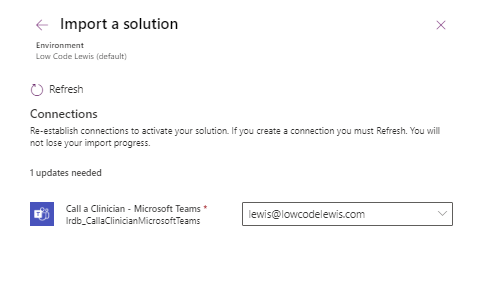
You’ll need to create connections for connectors that request this.
Once you get to the environment variables page. Paste in the values for your Client ID and Tenant ID that you noted down when you created your app registration.
Now paste in the values you noted down from creating your Key Vault in the following syntax.
/subscriptions/{Subscription ID}/resourceGroups/{Resource Group Name}/providers/Microsoft.KeyVault/vaults/{Key Vault Name}/secrets/{Secret Name}Finally, click import. And that is it! You can now go ahead creating skills, matching clinicians and creating hospital locations to get to work using the call a clinician app!
Build the solution yourself
Want to learn how to build this solution yourself? Check out the following blog posts and let me know how you get on building!