

So, in this post, we’re going to get started building our solution for planning revision and assignments whilst being able to utilise Teams Assignments data as context and public news data as context in our solution to deliver great UX/CX and impact. 💖
This solution should give students the ability to plan their homework and revision whilst saving time on the manual tasks such as copying data from Microsoft Teams assignments, and searching for background information on the web from things such as news articles. 📚
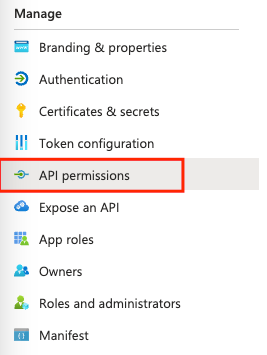
Creating the app registration
So lets start by creating an app registration in Azure AD which has the necessary permissions we’ll need to do this.
I’m going to start by creating an app called assignments and then I’ll head to the API permissions to add the Graph permissions we need to get hold of Teams assignments.
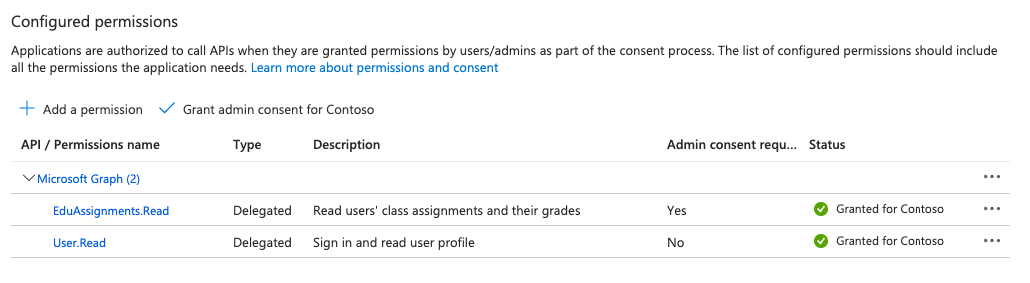
I’m going to select Add a permission, then Microsoft Graph, then delegated permissions and add the EduAssignments.Read delegated permission to my application. I then need to grant admin consent for this API permission as required.
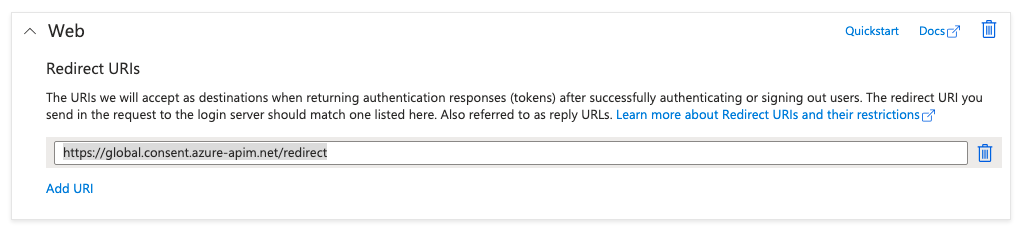
Next I’m going to head to Authentication and add a web platform with the following Redirect URI.
https://global.consent.azure-apim.net/redirect
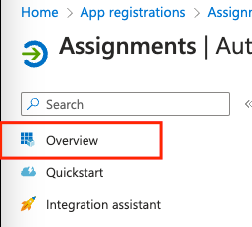
Now I’m going to head to Certificates & Secrets and create a client secret which I’ll need to note down the value of in a notepad or text edit window temporarily.
You’ll also need to copy down the client id of your app registration and tenant id which can be found on the overview page.
Now we’ll head over to Power Platform to start building our connector.
Some custom connector considerations
So now when it comes to building the custom connector, there are a number of best practices we should follow to do this properly. The first is to use Azure Key Vault to store our secret more securely and reference it in our custom connector using an environment variable.
The second practice we should follow is to use environment variables for all of the inputs we will have to make to the custom connector that would need to change in another environment, so primarily security variables and ones that reference the app registration. This just makes it much easier to transport and containerise the connector for use in other locations or organisations.
Configuring the Azure Key Vault
So, the next thing we’ll need to do is configure an Azure Key Vault to store our client secret in securely. This is best practice for working with secrets when developing on the Power Platform. It isn’t wise to just store a secret in a text environment variable, connector, or flow where it could be seen by others.
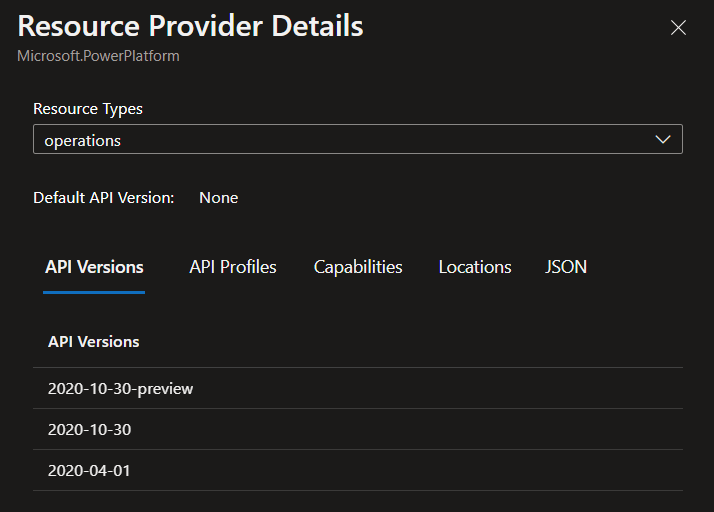
Microsoft.PowerPlatform provider
To do this head to a subscription you can use in your Azure Portal. First we need to head to resource providers under Settings and ensure we have registered the Microsoft.PowerPlatform provider.
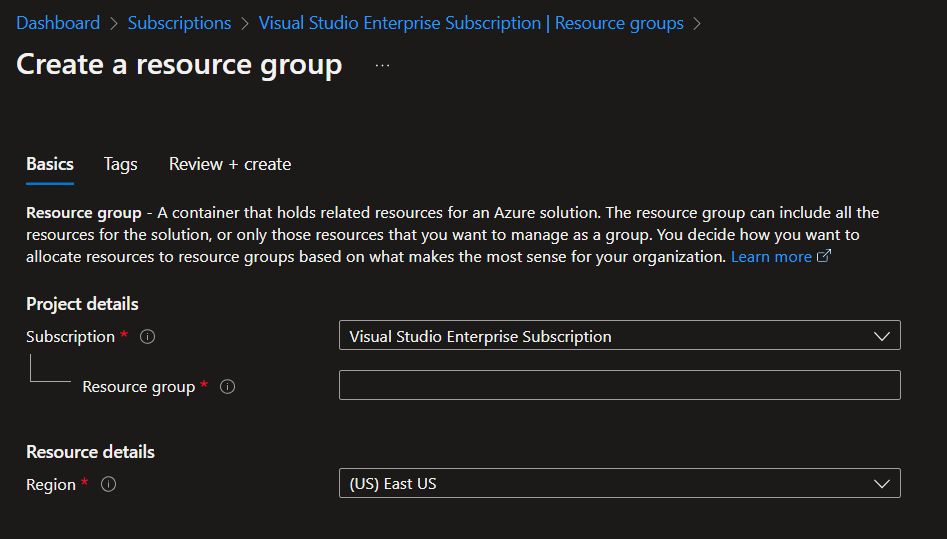
Resource group
Next we’ll need a resource group to create our key vault in. If you already have a resource group that would be suitable to use within the subscription we just registered the Microsoft.PowerPlatform provider for, you can use that, otherwise create a new one.
Simply just give it a name and region and set it to the subscription we just registered the Microsoft.PowerPlatform provider for and select review + create.
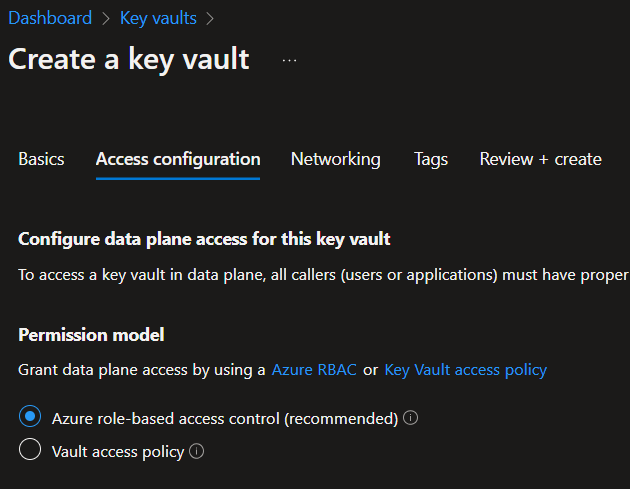
Key Vault
Now we can create our Key Vault. Search for Key Vaults in Azure and create one. Select the subscription and resource group you want to use or that you just created. Then give your key vault a name and set the appropriate region.
Next you can set the access configuration to use Azure RBAC (Azure role-based access control) and we will leave all other options as they are.
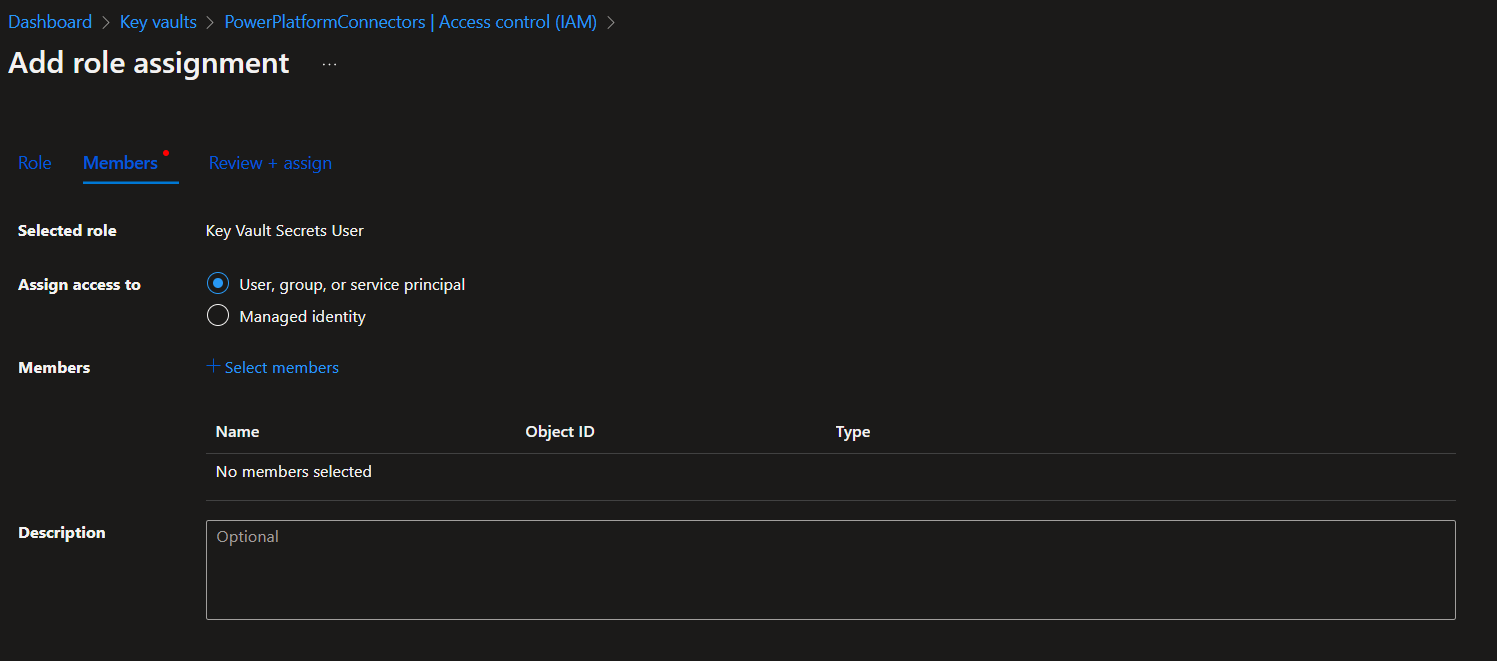
Now, once we have our key vault setup. A developer in Power Platform is going to need to create an environment variable to reference the key vault. Prior to this being possible we need to add some role assignments to give that person access. We also need to add some access for the Dataverse service principal.
Add the Key Vault Secrets User role within your new key vault to both the user who will create the environment variable, and to the Dataverse service principal (00000007-0000-0000-c000-000000000000).
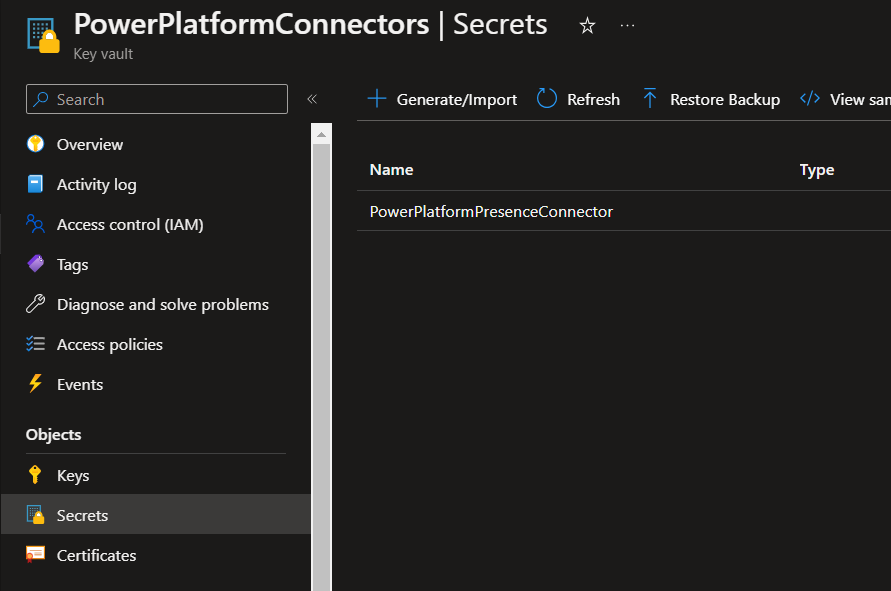
Next we can add our secret to our key vault. To do this head to Secrets under objects. Then select Generate/Import.
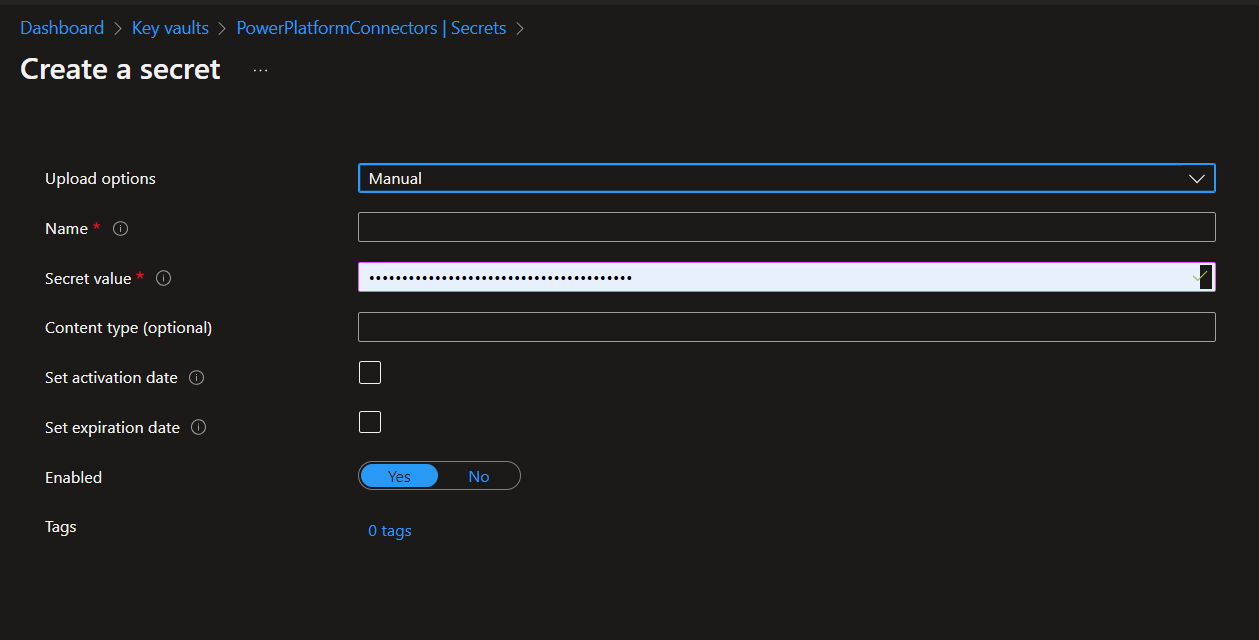
Select the manual upload option and then give the secret a name that describes it. You could match it with its description in your app registration for ease if you like. Then paste in the secret value that you temporarily stored in a notepad, to your secret value input. You can then set the date the secret was activated and when it will expire if you like. Then select create.
Following all of that you will need to copy the following details for us to start to move into Power Platform.
- Azure Subscription Id
- Resource Group Name
- Key Vault Name
- Secret Name
We’ll need these details to get hold of the secret from Key Vault in Power Platform in a moment when we build our connector.
Environment variables
Next we’re going to need to create some environment variables in our solution which we’ll reference in the custom connector we’re about to build. Create the following environment variables in the solution you created if you followed my blog post from yesterday.
| Variable Name | Variable Type | Value(s) |
|---|---|---|
| Assignments Authorisation URL | Text | https://login.microsoftonline.com |
| Assignments Client ID | Text | Client ID from the app registration you created (temporarily copied to notepad 😉) |
| Assignments Host | Text | graph.microsoft.com |
| Assignments Resource URL | Text | https://graph.microsoft.com |
| Assignments Secret | Secret | Paste in the values copied from your setup of Azure Key Vault. |
| Tenant ID | Text | Tenant ID copied from Azure Active Directory |
Environment variables to create for building your assignments custom connector
Now we can use these variables and reference them in the custom connector we’re going to build.
Building the custom connector
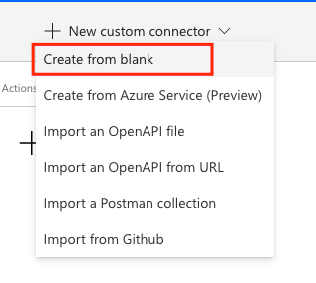
So now we will work on building the custom connector. To start head to make.powerapps.com or make.powerautomate.com and under Data in the left hand navigation select Custom connectors. Then select new custom connector and create from blank.
I’m going to give my custom connector a suitable name and select continue.

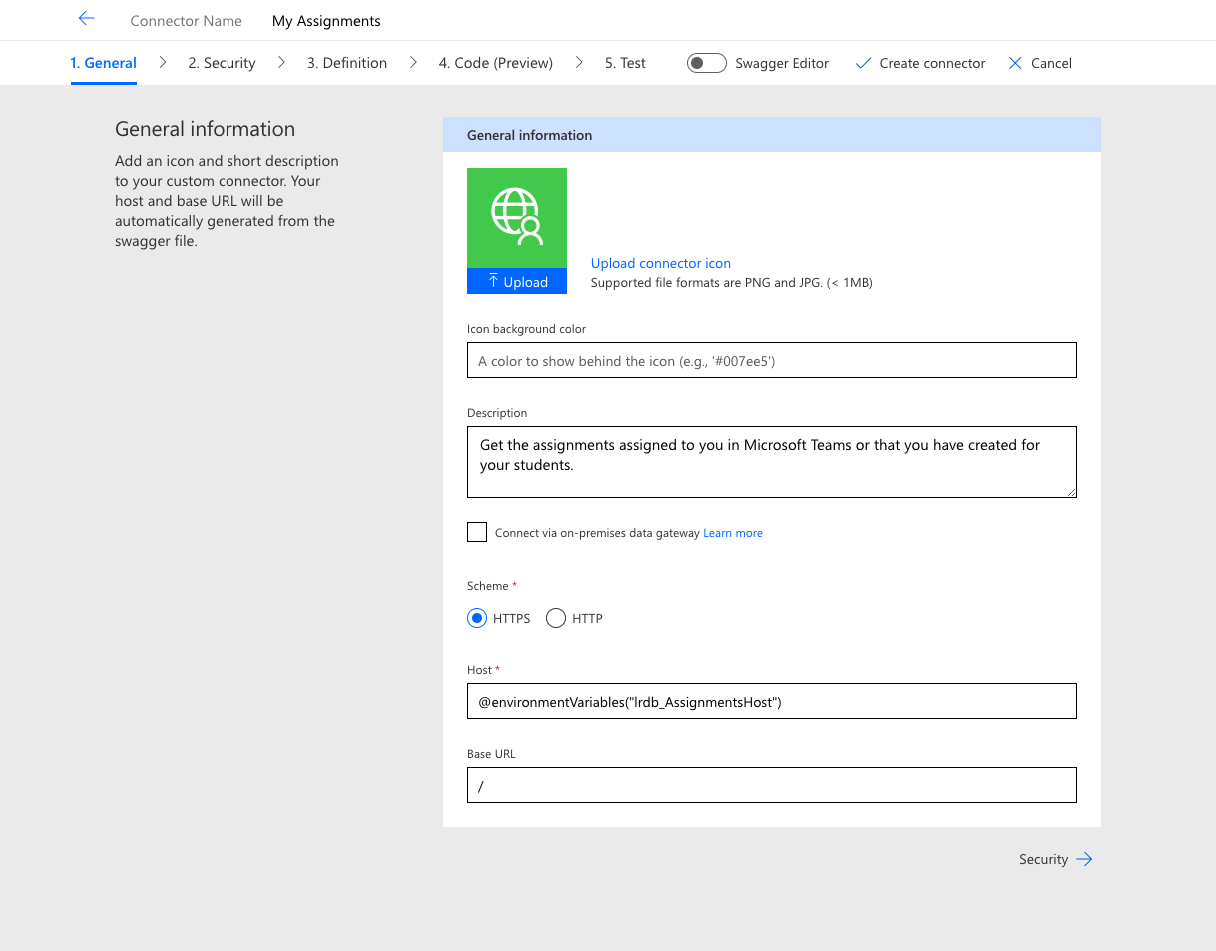
General
Now on the first page, and with the general information we can provide a bit of a description of our connector, add some branding with the icon and such to start with.
Then we will leave the scheme set to HTTPS and paste in the following value to reference my environment variable for the Host. If you’re building along with this post, make sure to use your internal name for your host environment variable as it is probably slightly different based on your publisher configuration and how you named your variable.
@environmentVariables(“lrdb_AssignmentsHost”)
Security
On the security page set the authentication type to OAuth 2.0 and then using the fields that appear set the identity provider to Azure Active Directory which is where we registered our application and where our user information comes from.
Now paste in the relevant environment variable references for each of the fields in the same way that we did it for the host.
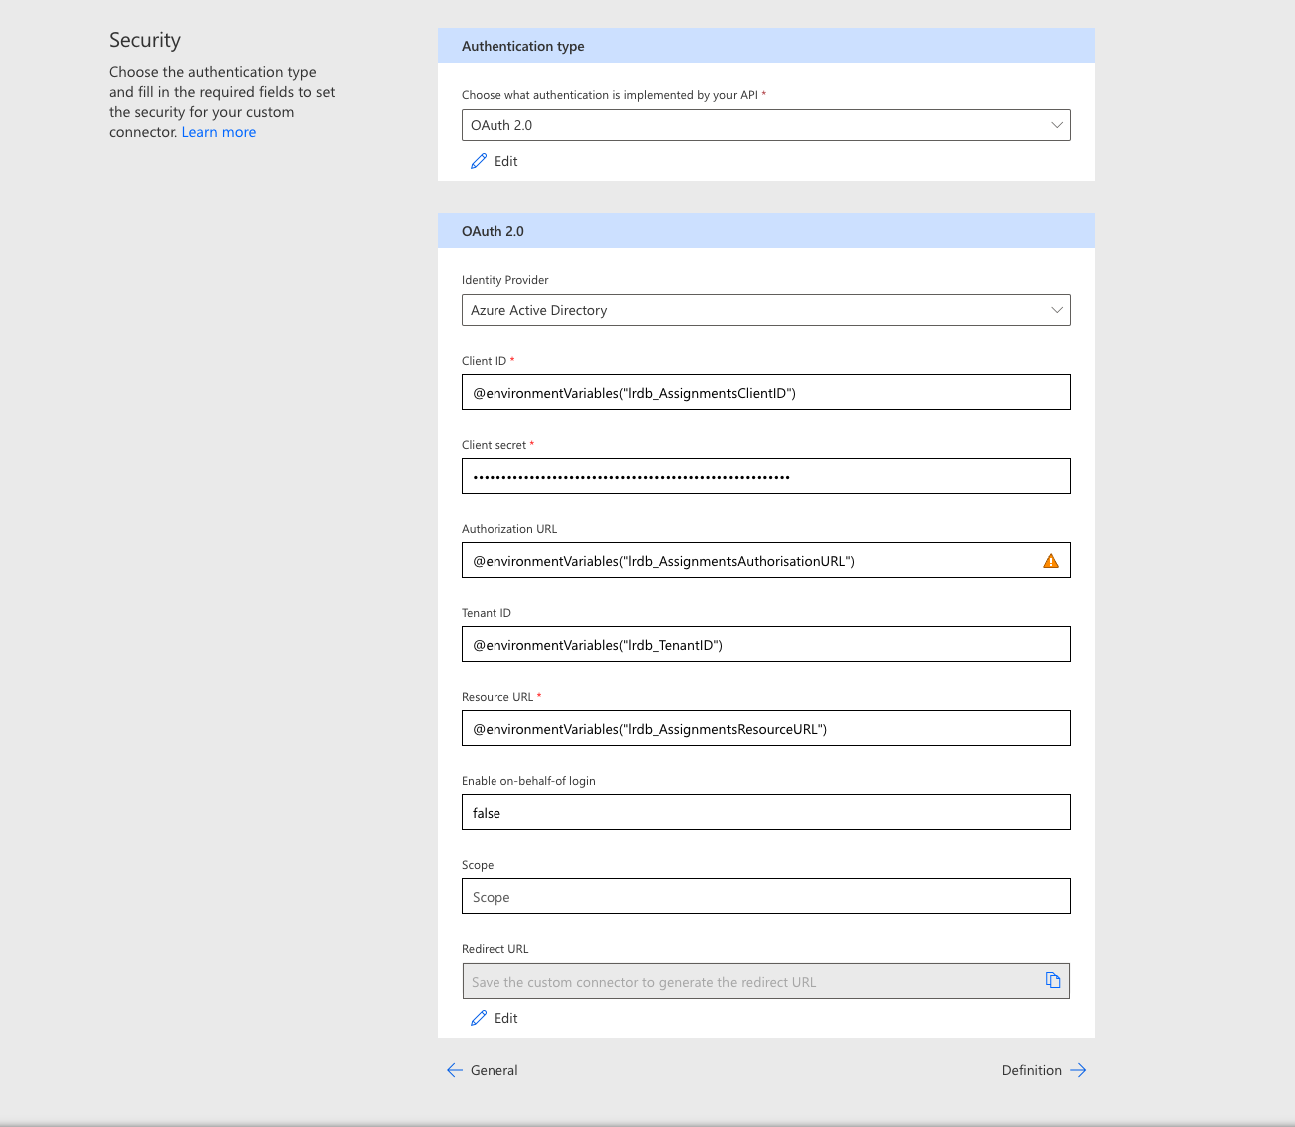
Once we have finished populating the security fields, we can move onto building out the definition of the custom connector.
Definition
For the definition, add a new action and then give it a summary and operation ID. I’m calling mine get my assignments. This is the action name.
Then move to the request building and click import from sample.
Then select the GET method and add the following request URL. We are going to hard code this and not use any parameters because the action will dynamically get the current user which is the only dynamic information we need. We can achieve this using users context through this custom connector and the users connection, and the me element of the URL. Click import.
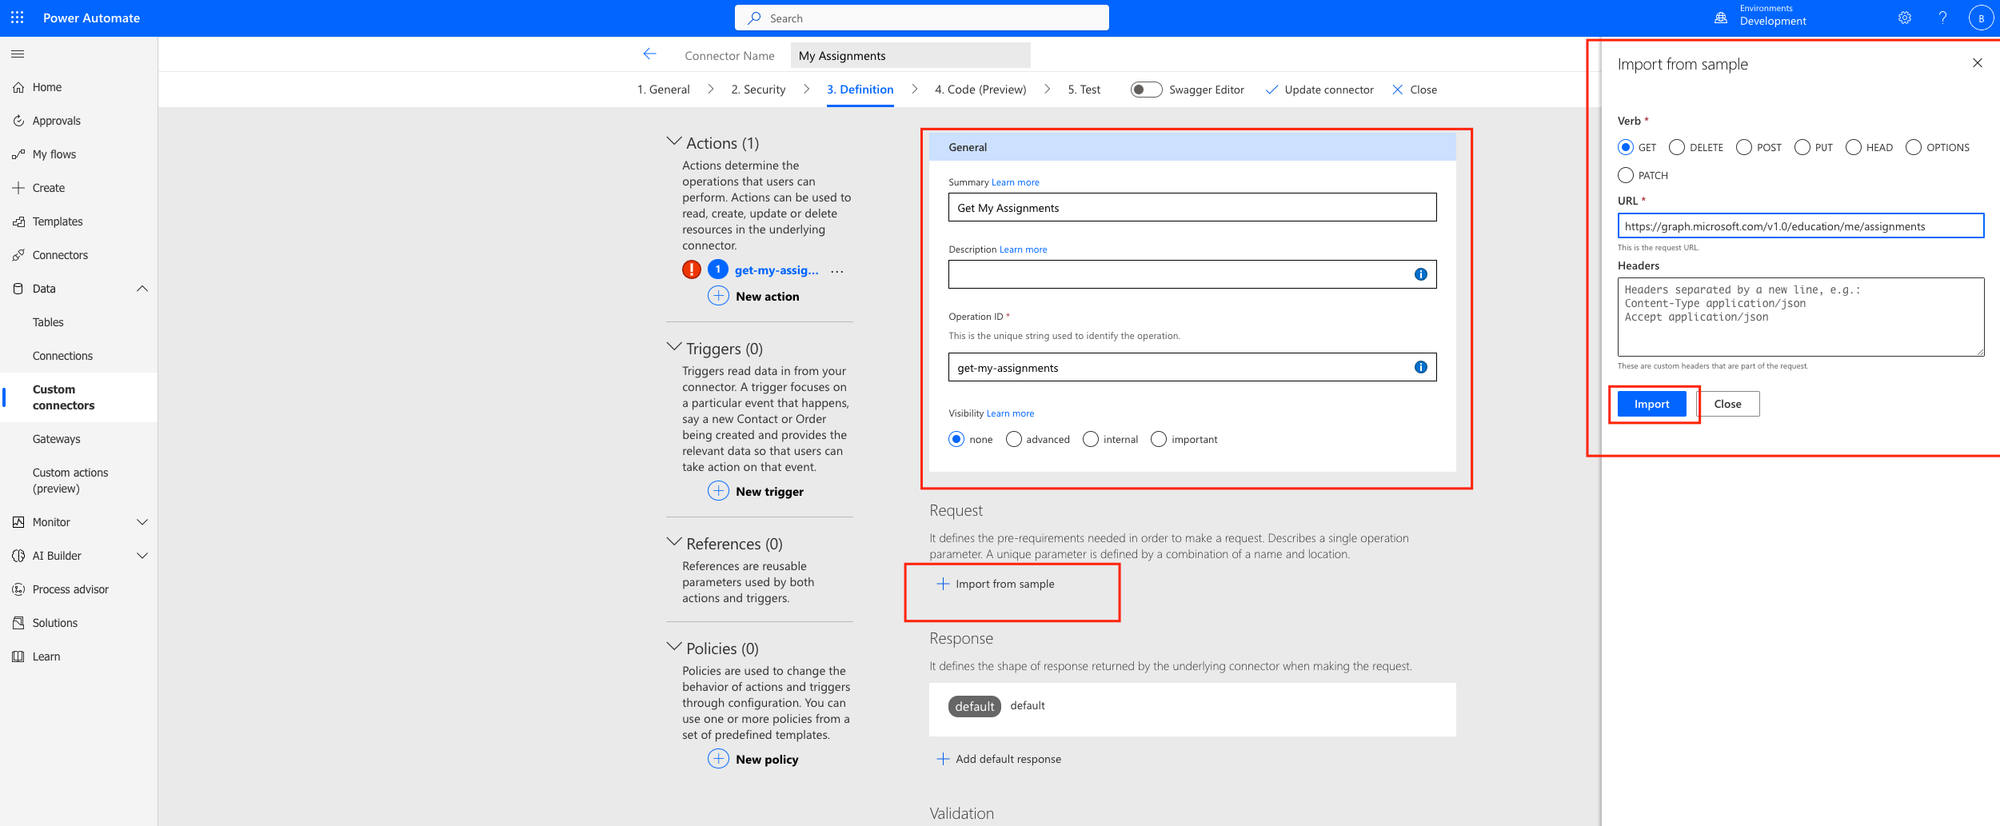
Next we can shape our response if we like with a sample of a response. If you’d like to do this you can use an example output from Graph Explorer to ensure all of the fields are present. I recommend doing this if you’d like dynamic content to work with and its what I’m going to do.
Once you’ve done that you can select ‘Create connector’ and then move to the test area to see if it works.
We don’t need to worry about the code tab.
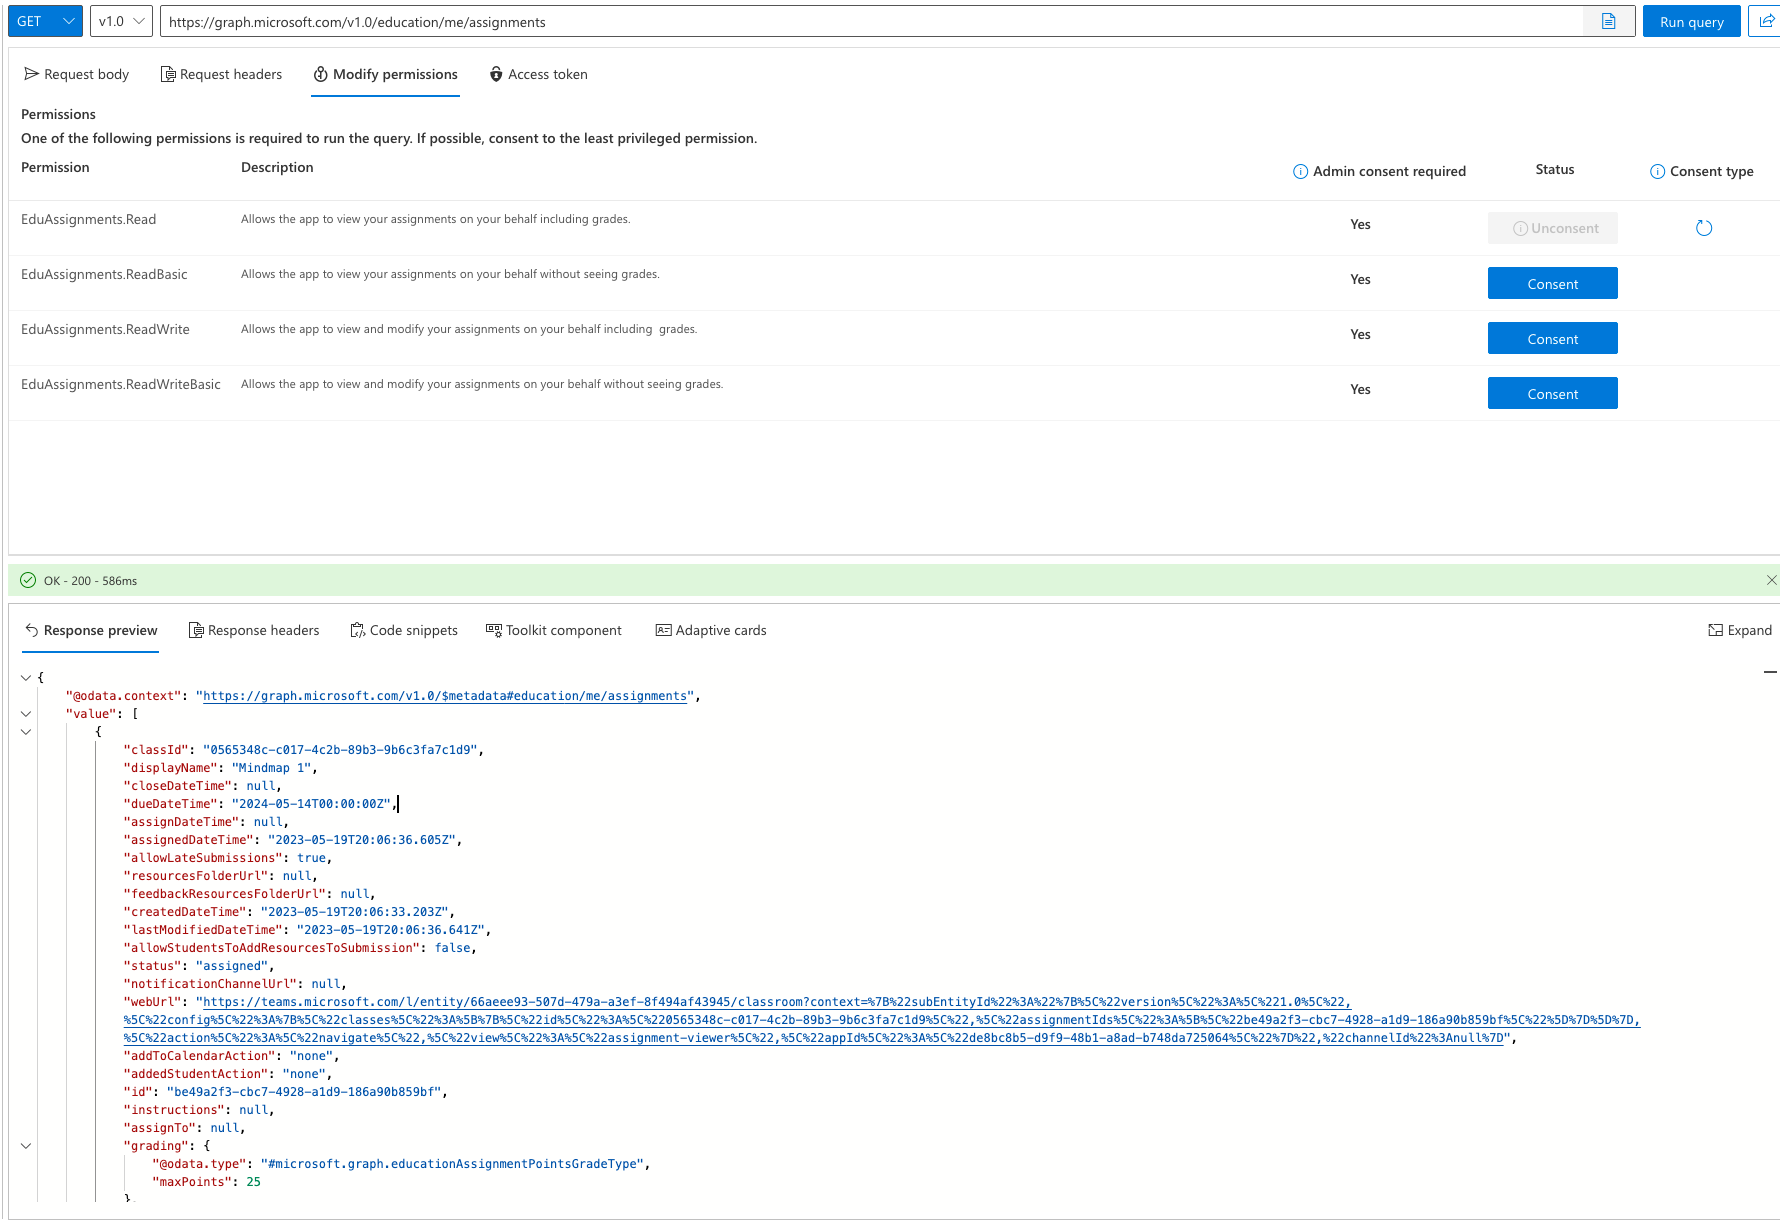
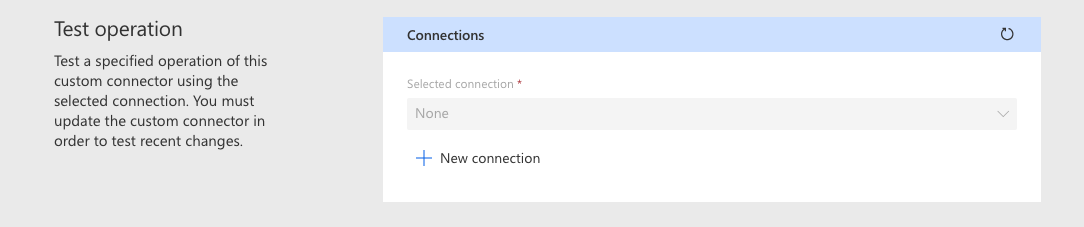
Test
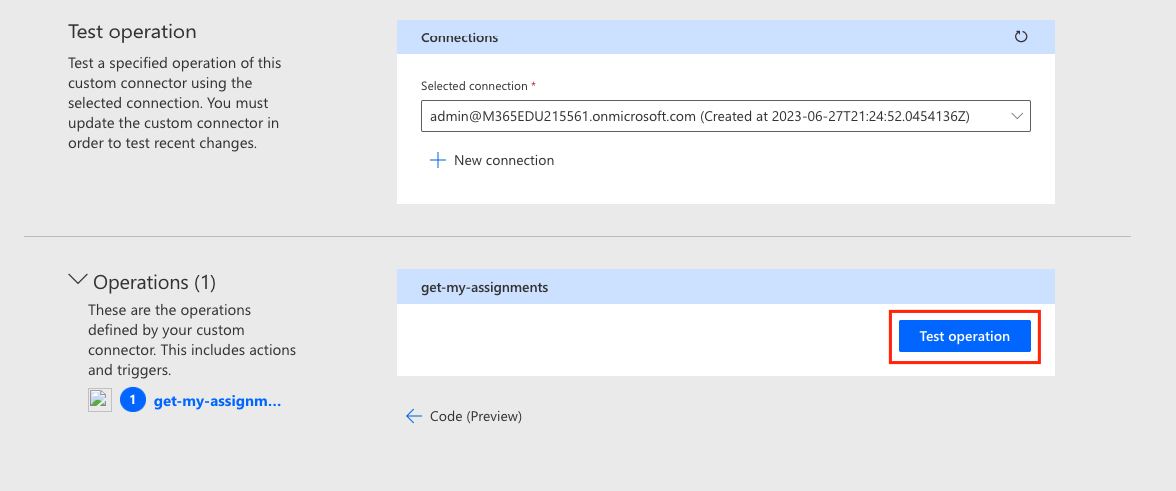
On the test screen if you’ve not done so already for this new connector, create a connection and accept the permissions requested if prompted by the Microsoft login prompt.
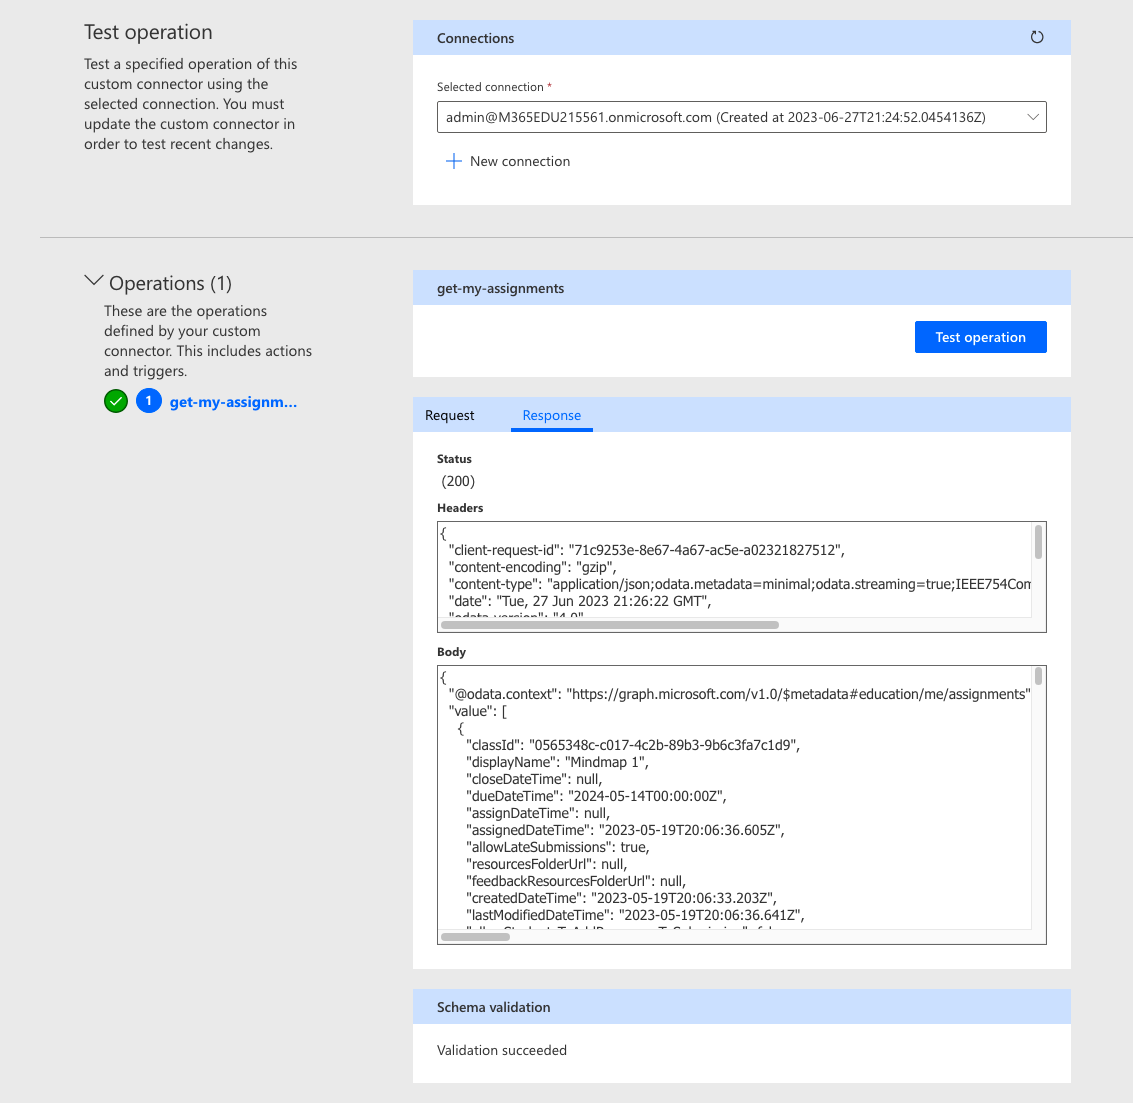
Once you’ve created your connection you should be able to test the operation.
Give it a go and if you’ve configured things correctly, you should see a successful response with a 200 status and a body with assignments records in it.
Overview and upcoming content
So now we’ve built our custom connector for getting Microsoft Teams assignments for education. In the next posts in this mini-series we’ll use this connector to build our app and surface assignments in our app for students to add to their revision and homework schedule plan.
Make sure you’re subscribed to my blog to ensure you get the upcoming posts in this mini-series directly in your inbox! Don’t miss any of the steps, we’re going to move quickly with this! 📧
Subscribe