

Ever wondered how CI/CD type development scenarios work when building with the Power Platform? In this blog post, I’m going to move away from talking about the Power Platform CLI, and we’ll start to look at something now based on the Power Platform CLI but that is a little less command line like and solely focuses on an ALM (application lifecycle management) story!
In this post, we’ll take a look at an introduction to the Power Platform Build Tools and what we can achieve with them in DevOps, and we’ll get setup for working with them with things like environment connections.
What do we use the Build Tools for?
So effectively the Power Platform Build Tools are a bundle of Azure DevOps build tasks that support ALM (application lifecycle management) operations for managing the application lifecycle of solutions developers have built on Power Platform.
We’re able to do things like generate build artifacts and create releases, run deployments to different environments and much more!
We won’t get too technical in this post as to how we accomplish things like automated deployments and a CI/CD type development workflow by configuring DevOps pipelines, but we’ll work on getting things setup ready to use the Build Tools as part of pipelines which support these scenarios.
Install the Power Platform Build Tools
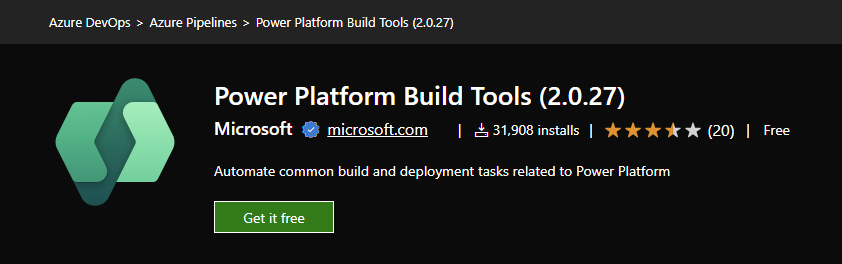
So first, we’ll need to install the Power Platform Build Tools and add them to our Azure DevOps organisation by heading over to the Azure Marketplace.
You can get the Power Platform Build Tools (v2.0) below…
Power Platform Build Tools (2.0.27) – Visual Studio Marketplace
Start by selecting ‘Get it free’ and you should be navigated to a page to install the tools in your DevOps organisation.
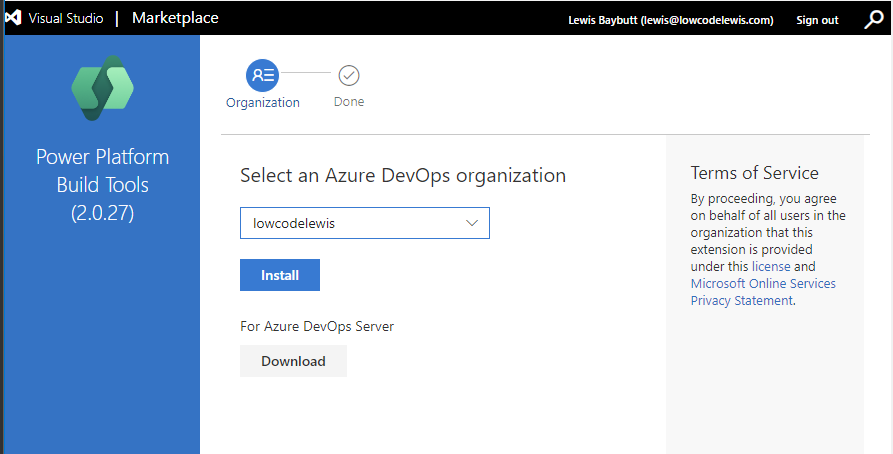
Now select the DevOps organisation you’d like to use build tools in, or that contains the project you’d like to use Build Tools in, and select ‘Install’.
Finally select ‘Process to organisation’ to head back to DevOps.
Create an app registration for connection
So now we need to configure a service principal. Microsoft provide a PowerShell script which we can use to do this for us including the app registration creation, assigning the correct API permissions, and creating the secret.
First let’s take a look inside the script at the permissions that will end up being assigned to the app registration.

You can see we need the User.Read permission for Microsoft Graph which is added normally automatically to any created app registrations. Then we will need the PowerApps-Advisor Analysis.All permission and the Dataverse/CDS user_impersonation permission.
Find the PowerShell script that will create the service principal here – Microsoft Power Platform Build Tools for Azure DevOps – Power Platform | Microsoft Learn
Running the script
Now let’s run the script and observe the behaviour.
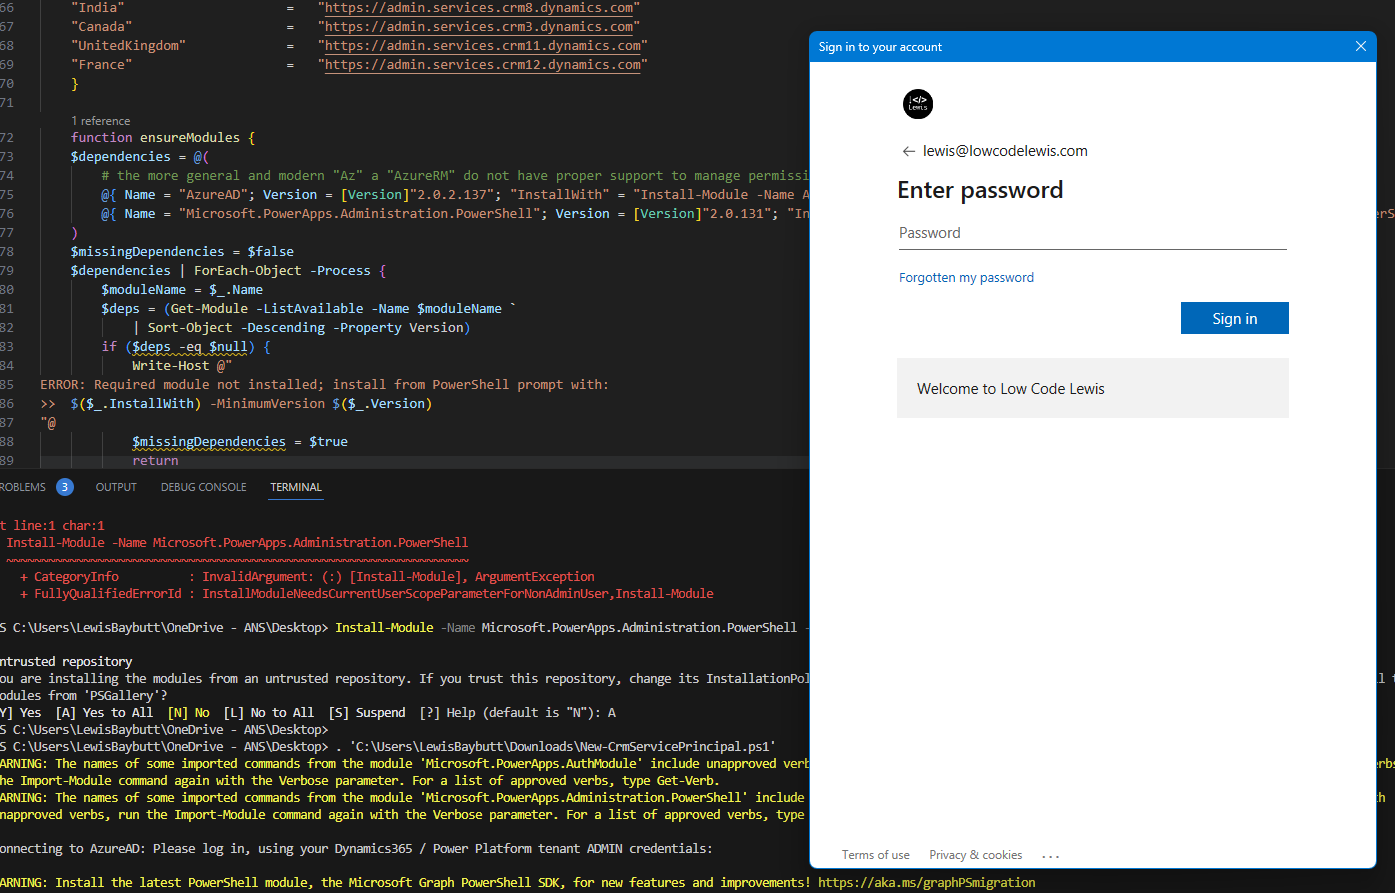
First we’ll get a login screen to authenticate so the script can create our app in Azure, then we’ll get another so that it can authenticate against our Power Platform tenant Id.
Once the script has finished running we will end up with the details of our app registraion with our tenant Id, app Id and client secret.
Provide access to the environment with the registered app
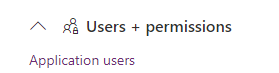
Now we need to head over to our Power Platform Admin Center and add our app as an application user to the environment we want to use build tools with. Chances are there are multiple environments we want to do this for if we are doing this with the hope of automating deployments or something like that. Whether you use the same service principal for each environment is up to you. Some might use different ones for a reduced security risk but it’s up to you.
In the admin center head to the environment that you want to use with Build Tools and then navigate to application users within the environment settings.
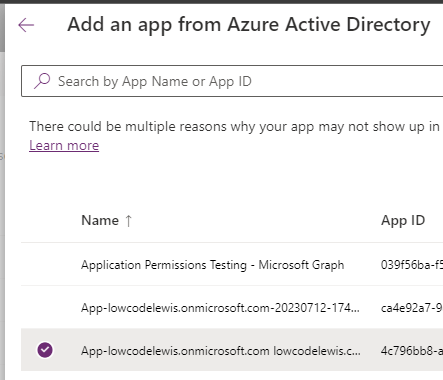
Then select add new app, select the app.
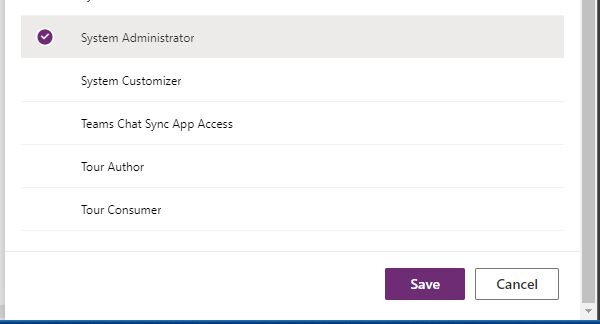
Now select the default business unit and apply the system administrator role.
Configure the connection in DevOps
Now we can finish up by configuring the connection for Build Tools in DevOps. Head to DevOps and create a pipeline that uses a Build Tools task that will require being authenticated such as the export solution task.
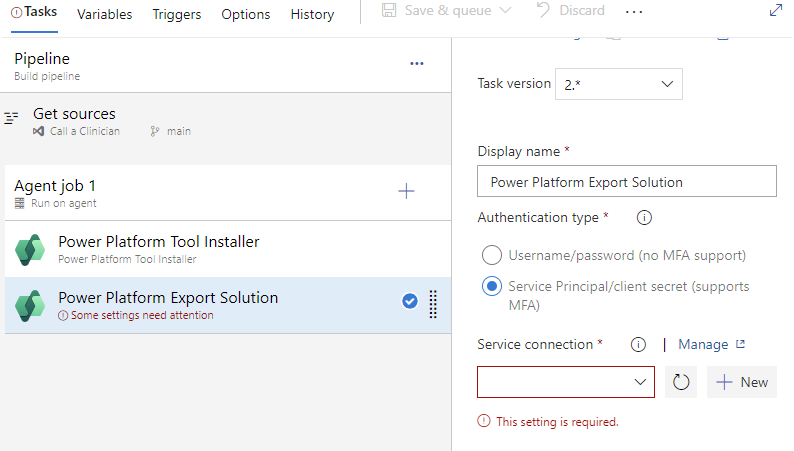
From there select ‘Service Principal/client secret’ and then select New for the service connection input.
Now we have a number of fields to populate.
For the Server URL populate the organisation URL of the Dataverse environment/organisation you’re trying to work with.
Now in the Tenant ID input populate the Tenant ID provided by the script you ran.
Again for the Application ID input, populate the app ID provided by the script you ran.
Finally for the Client secret input, poprulate the client secret provided by the script you ran.
Now give the connection a name and you can save things.
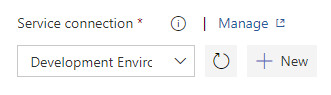
Now your service connection should be available to select in Build Tools steps that require credentials:
Upcoming content
In upcoming posts on Low Code Lewis we’ll continue to look into the ALM developer tools, specifically around the Build Tools for DevOps for working with Power Platform, and we’ll look at how it is possible to achieve a CI/CD approach using pipelines and Azure DevOps.
Stay tuned by subscribing to my blog below! 📩
Subscribe